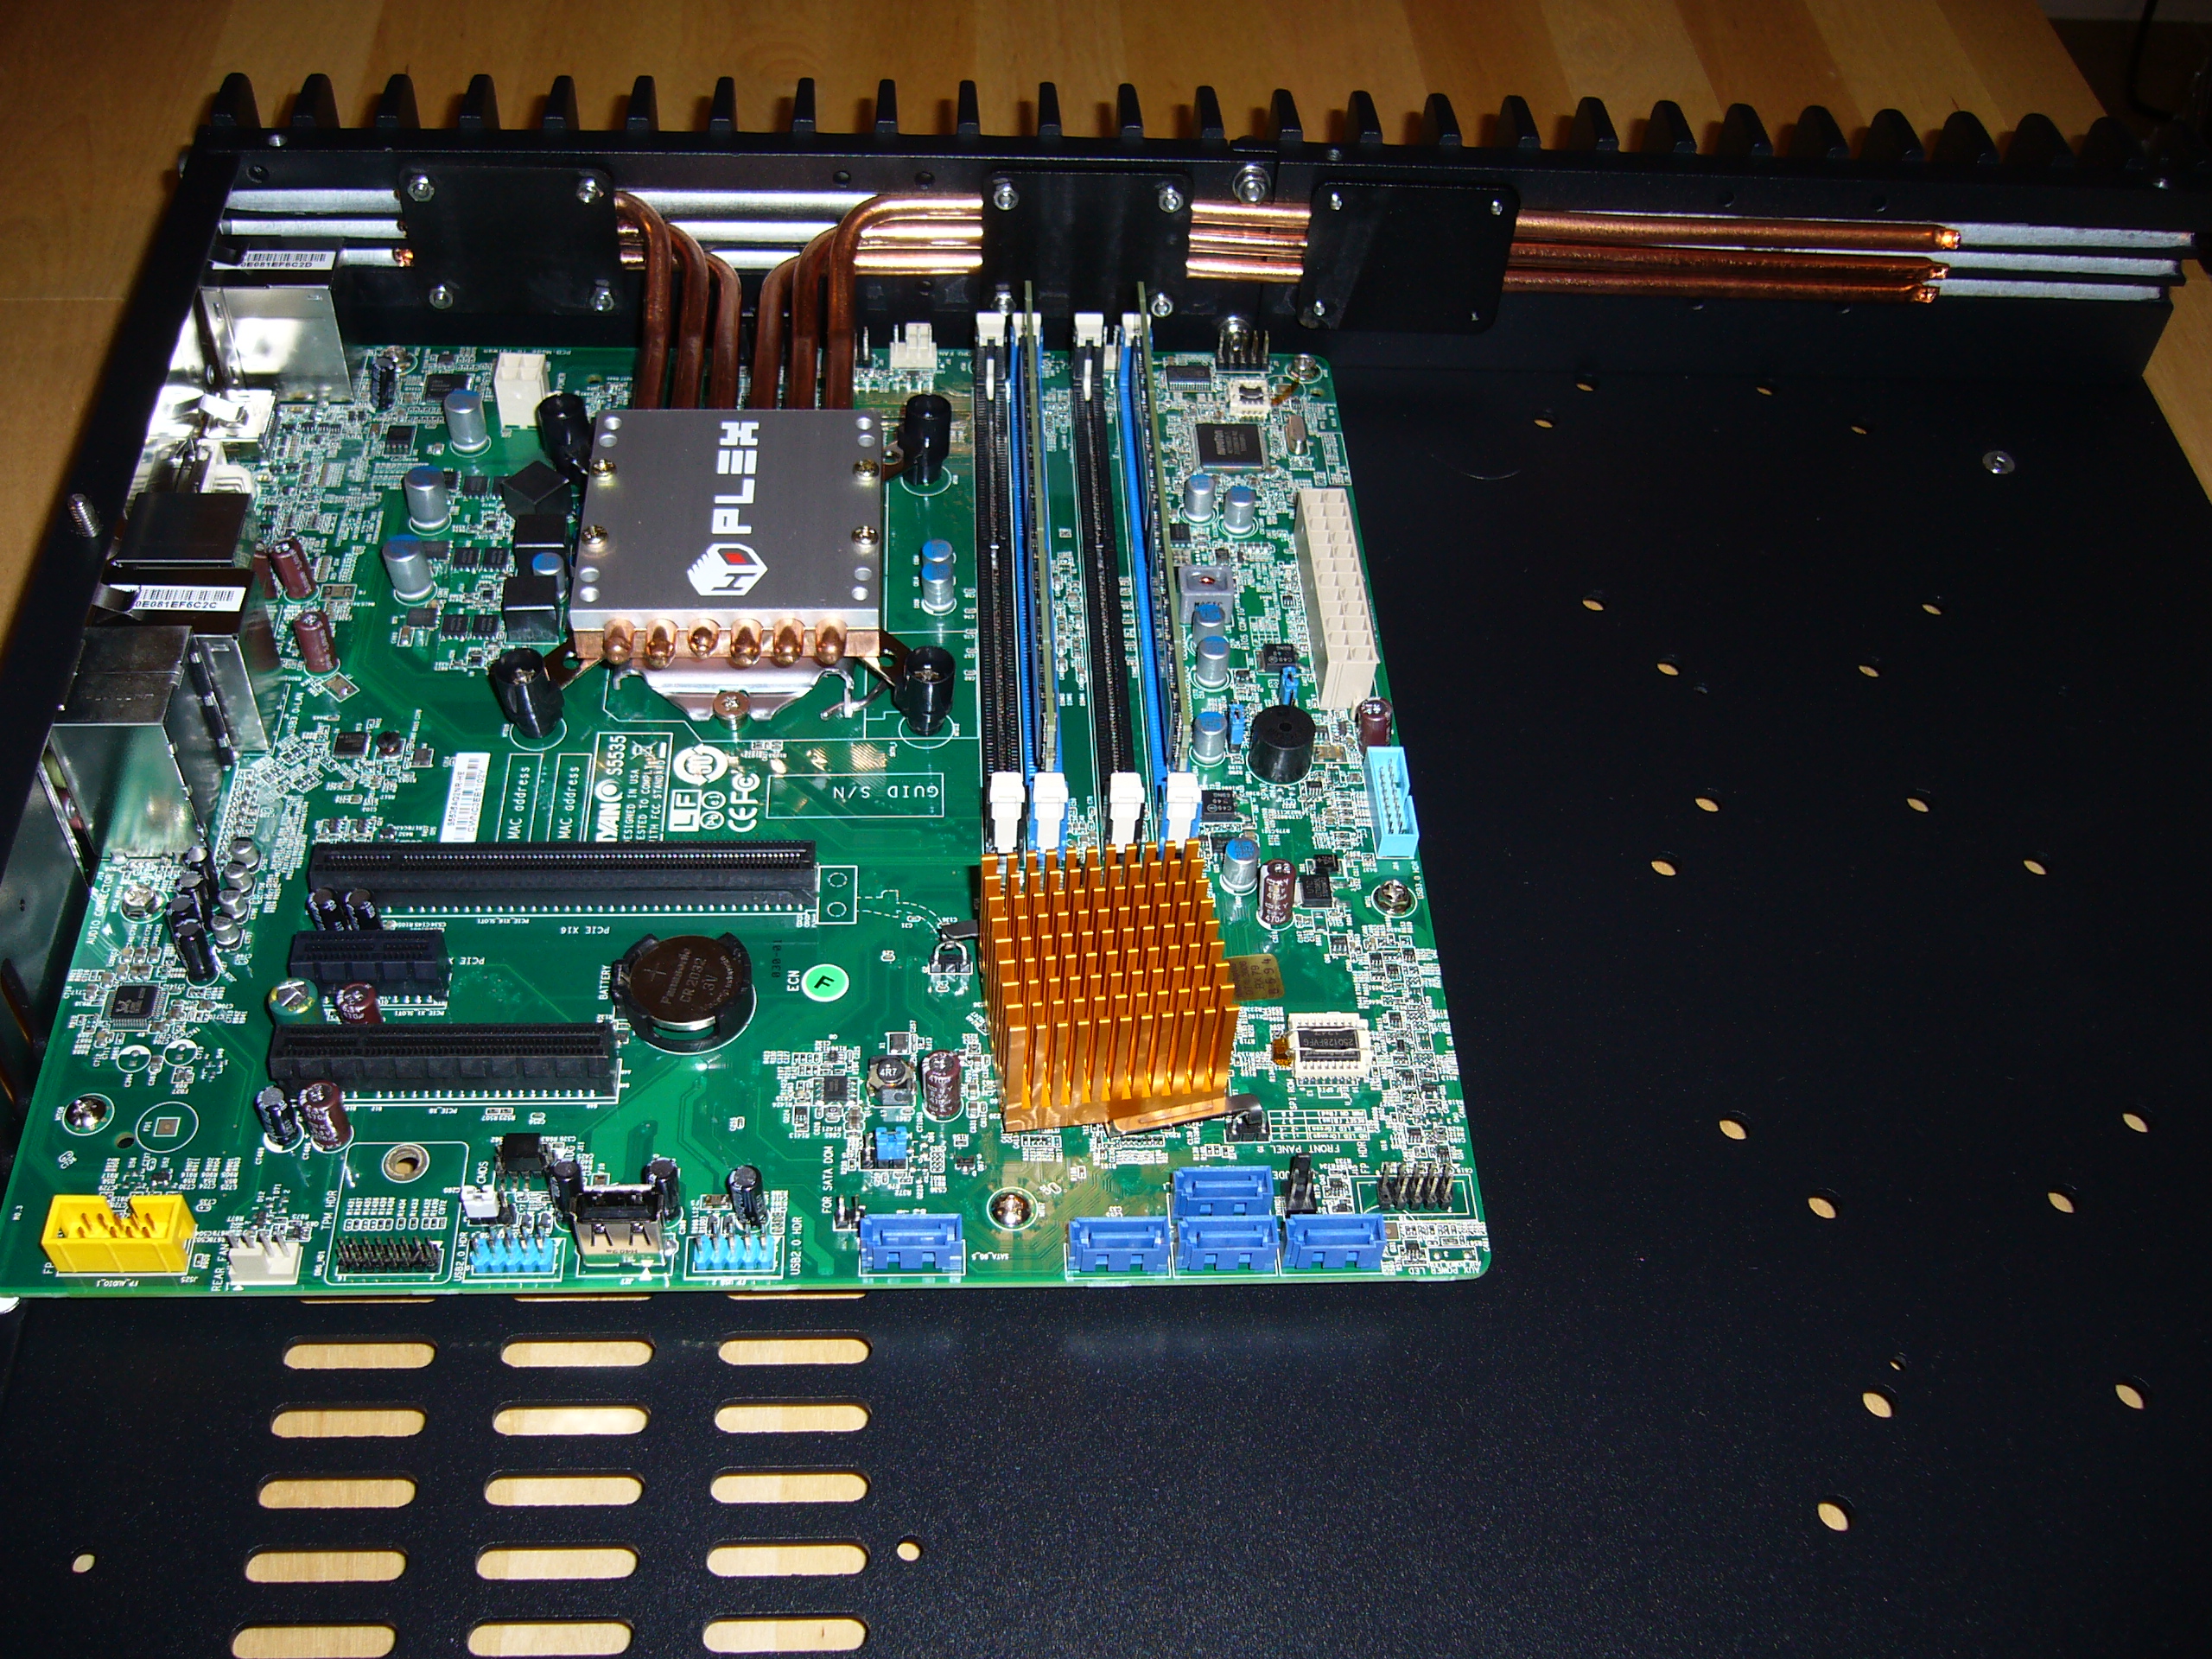
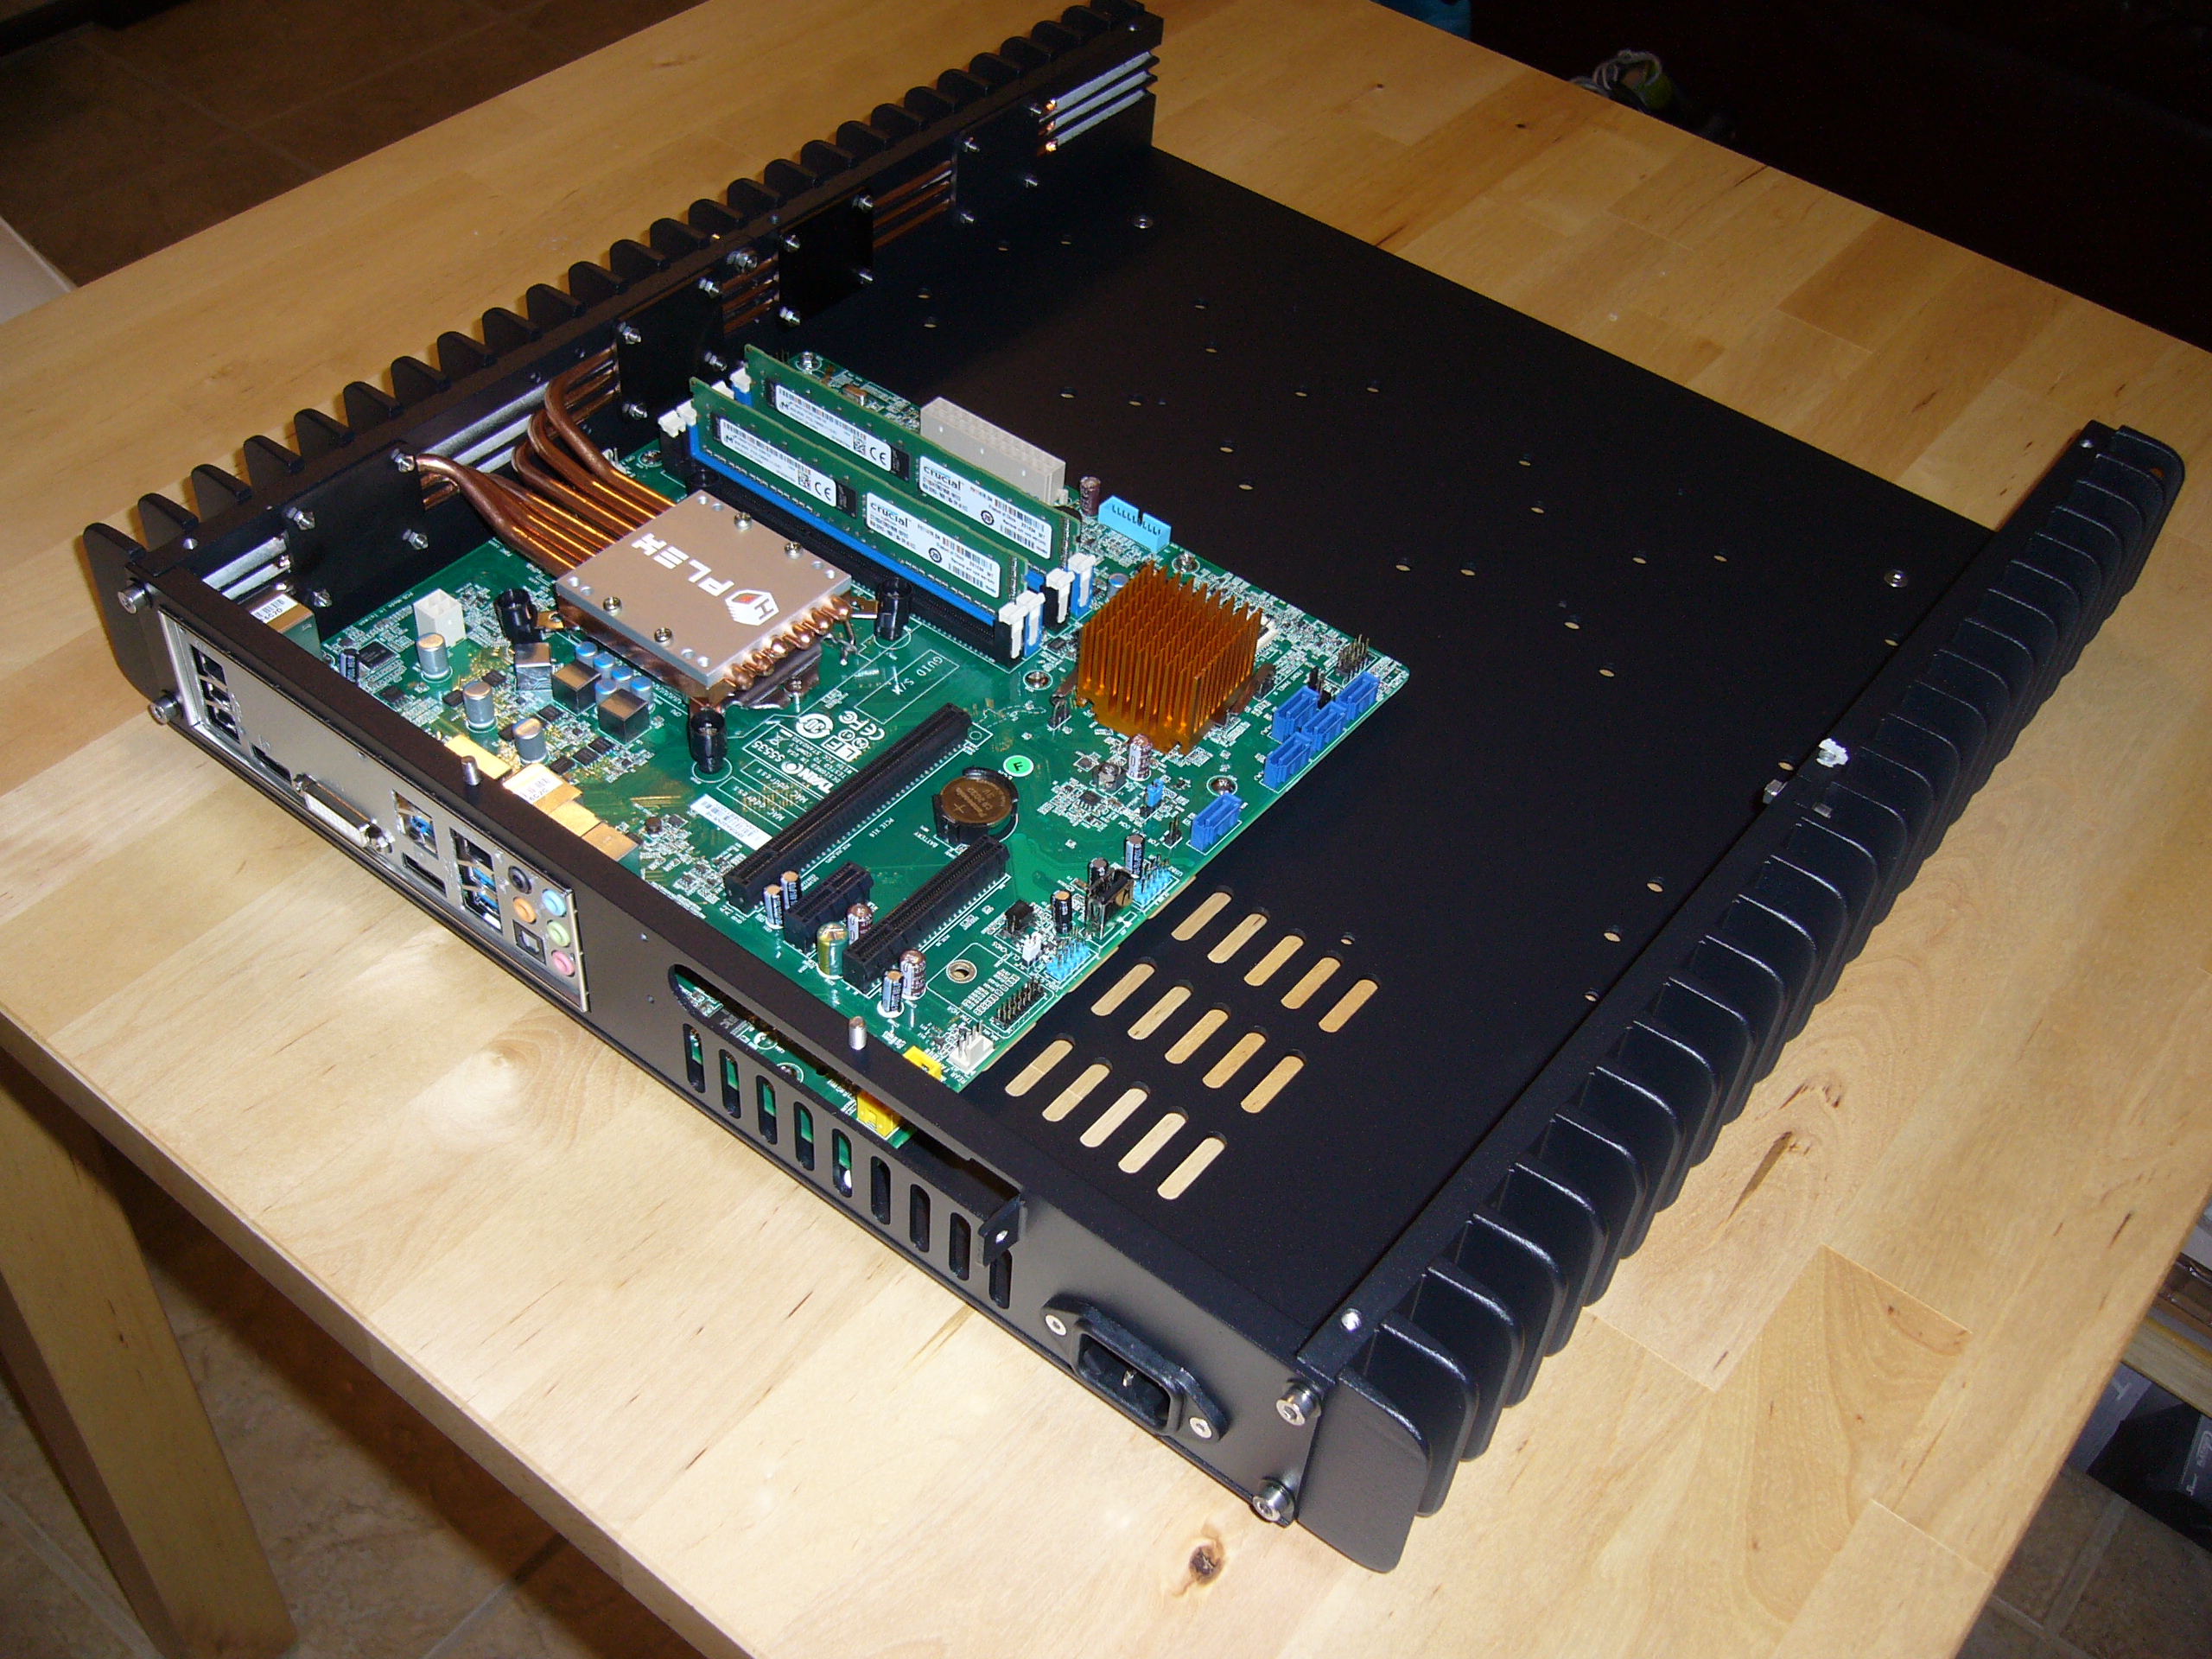
 A view of the motherboard, with the CPU block, heat pipes, and three of the four retainers loosely assembled.
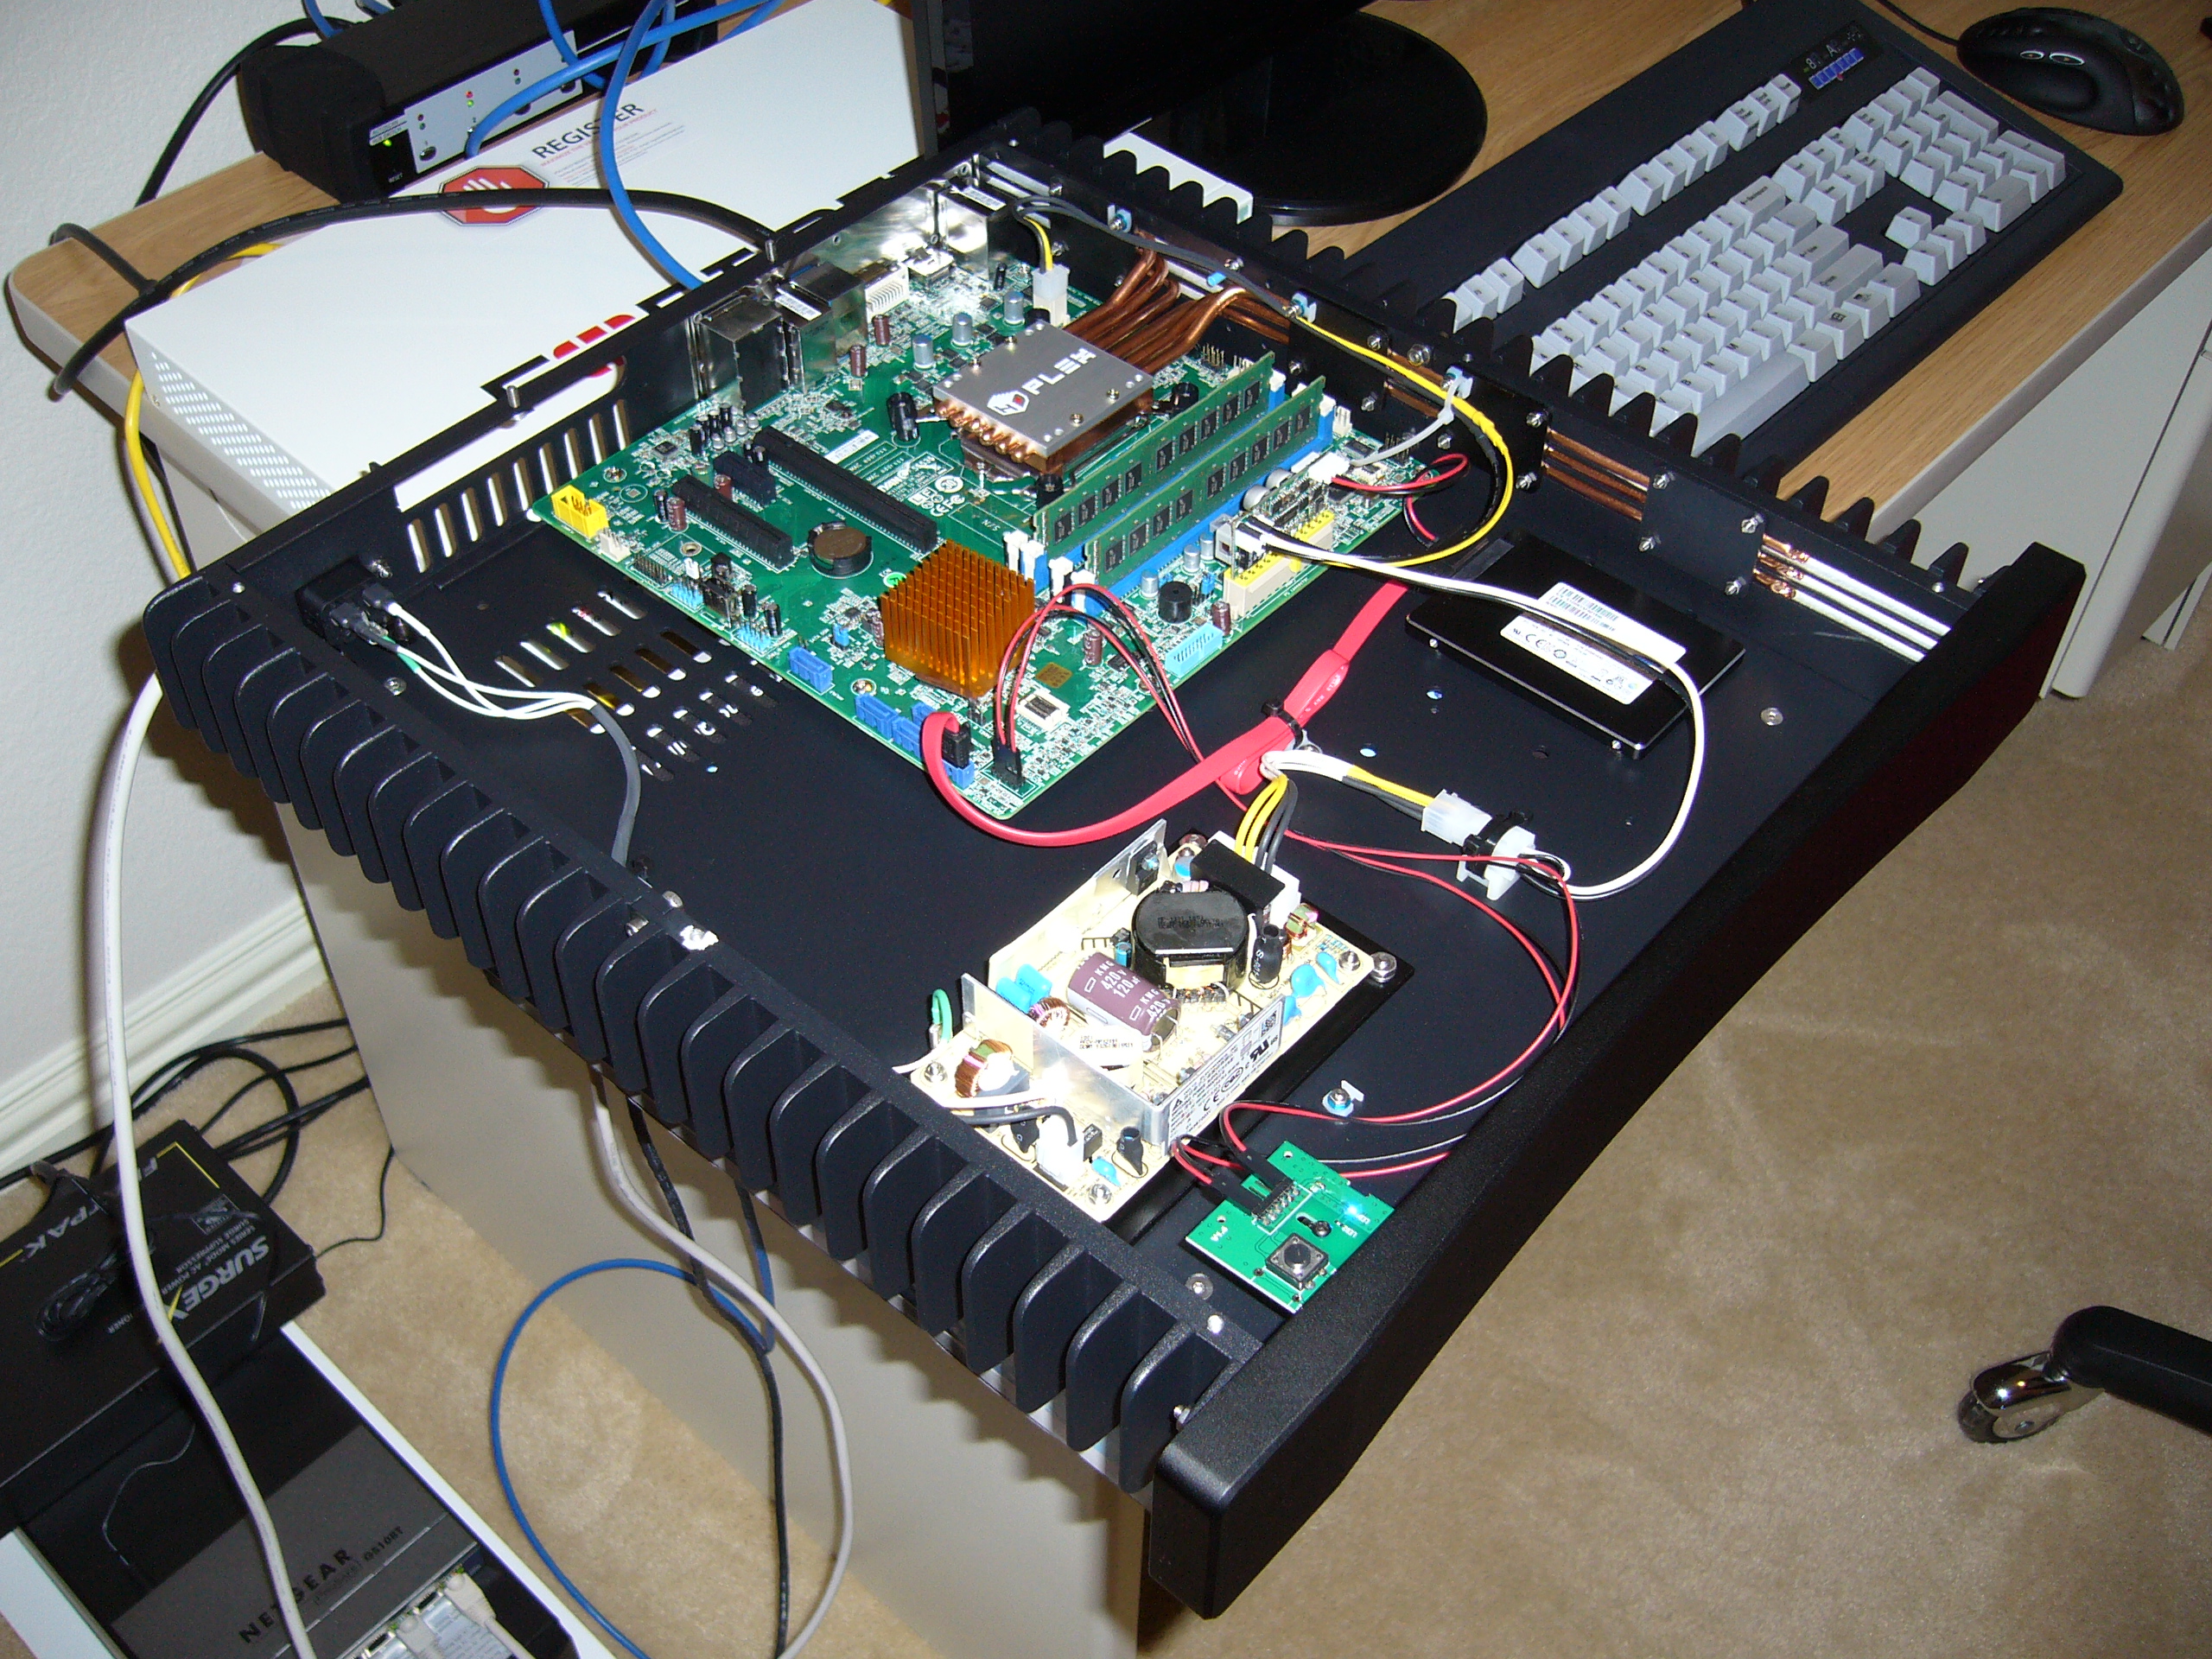
I installed the CPU block using the hardware included with the kit, and following the instructions. It works, but I wish I had modified it to be more secure and less fiddly. (I did so with subsequent HDPlex builds.)
Note the Zalman heat sink on the chipset. I love those things. They have been discontinued for years, but I managed to gather a stash of them and use them often.
The C226 is only a 4W device, but I'm paranoid and most stock chipset heat sinks are garbage. In any case, it runs quite cool.
Also note the rather simple CPU voltage regulator on the motherboard. The Haswell had a portion of its voltage regulation integrated into the CPU (the "FIVR"). The i3-4130T, with only two cores and a fixed clock, is a true 35W device, so the regulator has a pretty easy task.
Interestingly, this system is not completely silent. The CPU (or something in its vicinity) whistles/whines audibly, with tone and volume varying with load.
Something less visible in these photos are the feet - or at least the screws holding the feet - near each corner of the bottom plate. In this model the feet screwed in through the top of the bottom plate, so I Loctited them into place. A loose screw under the motherboard would be a disaster.
Note that the case heat sinks are in two pieces, screwed together.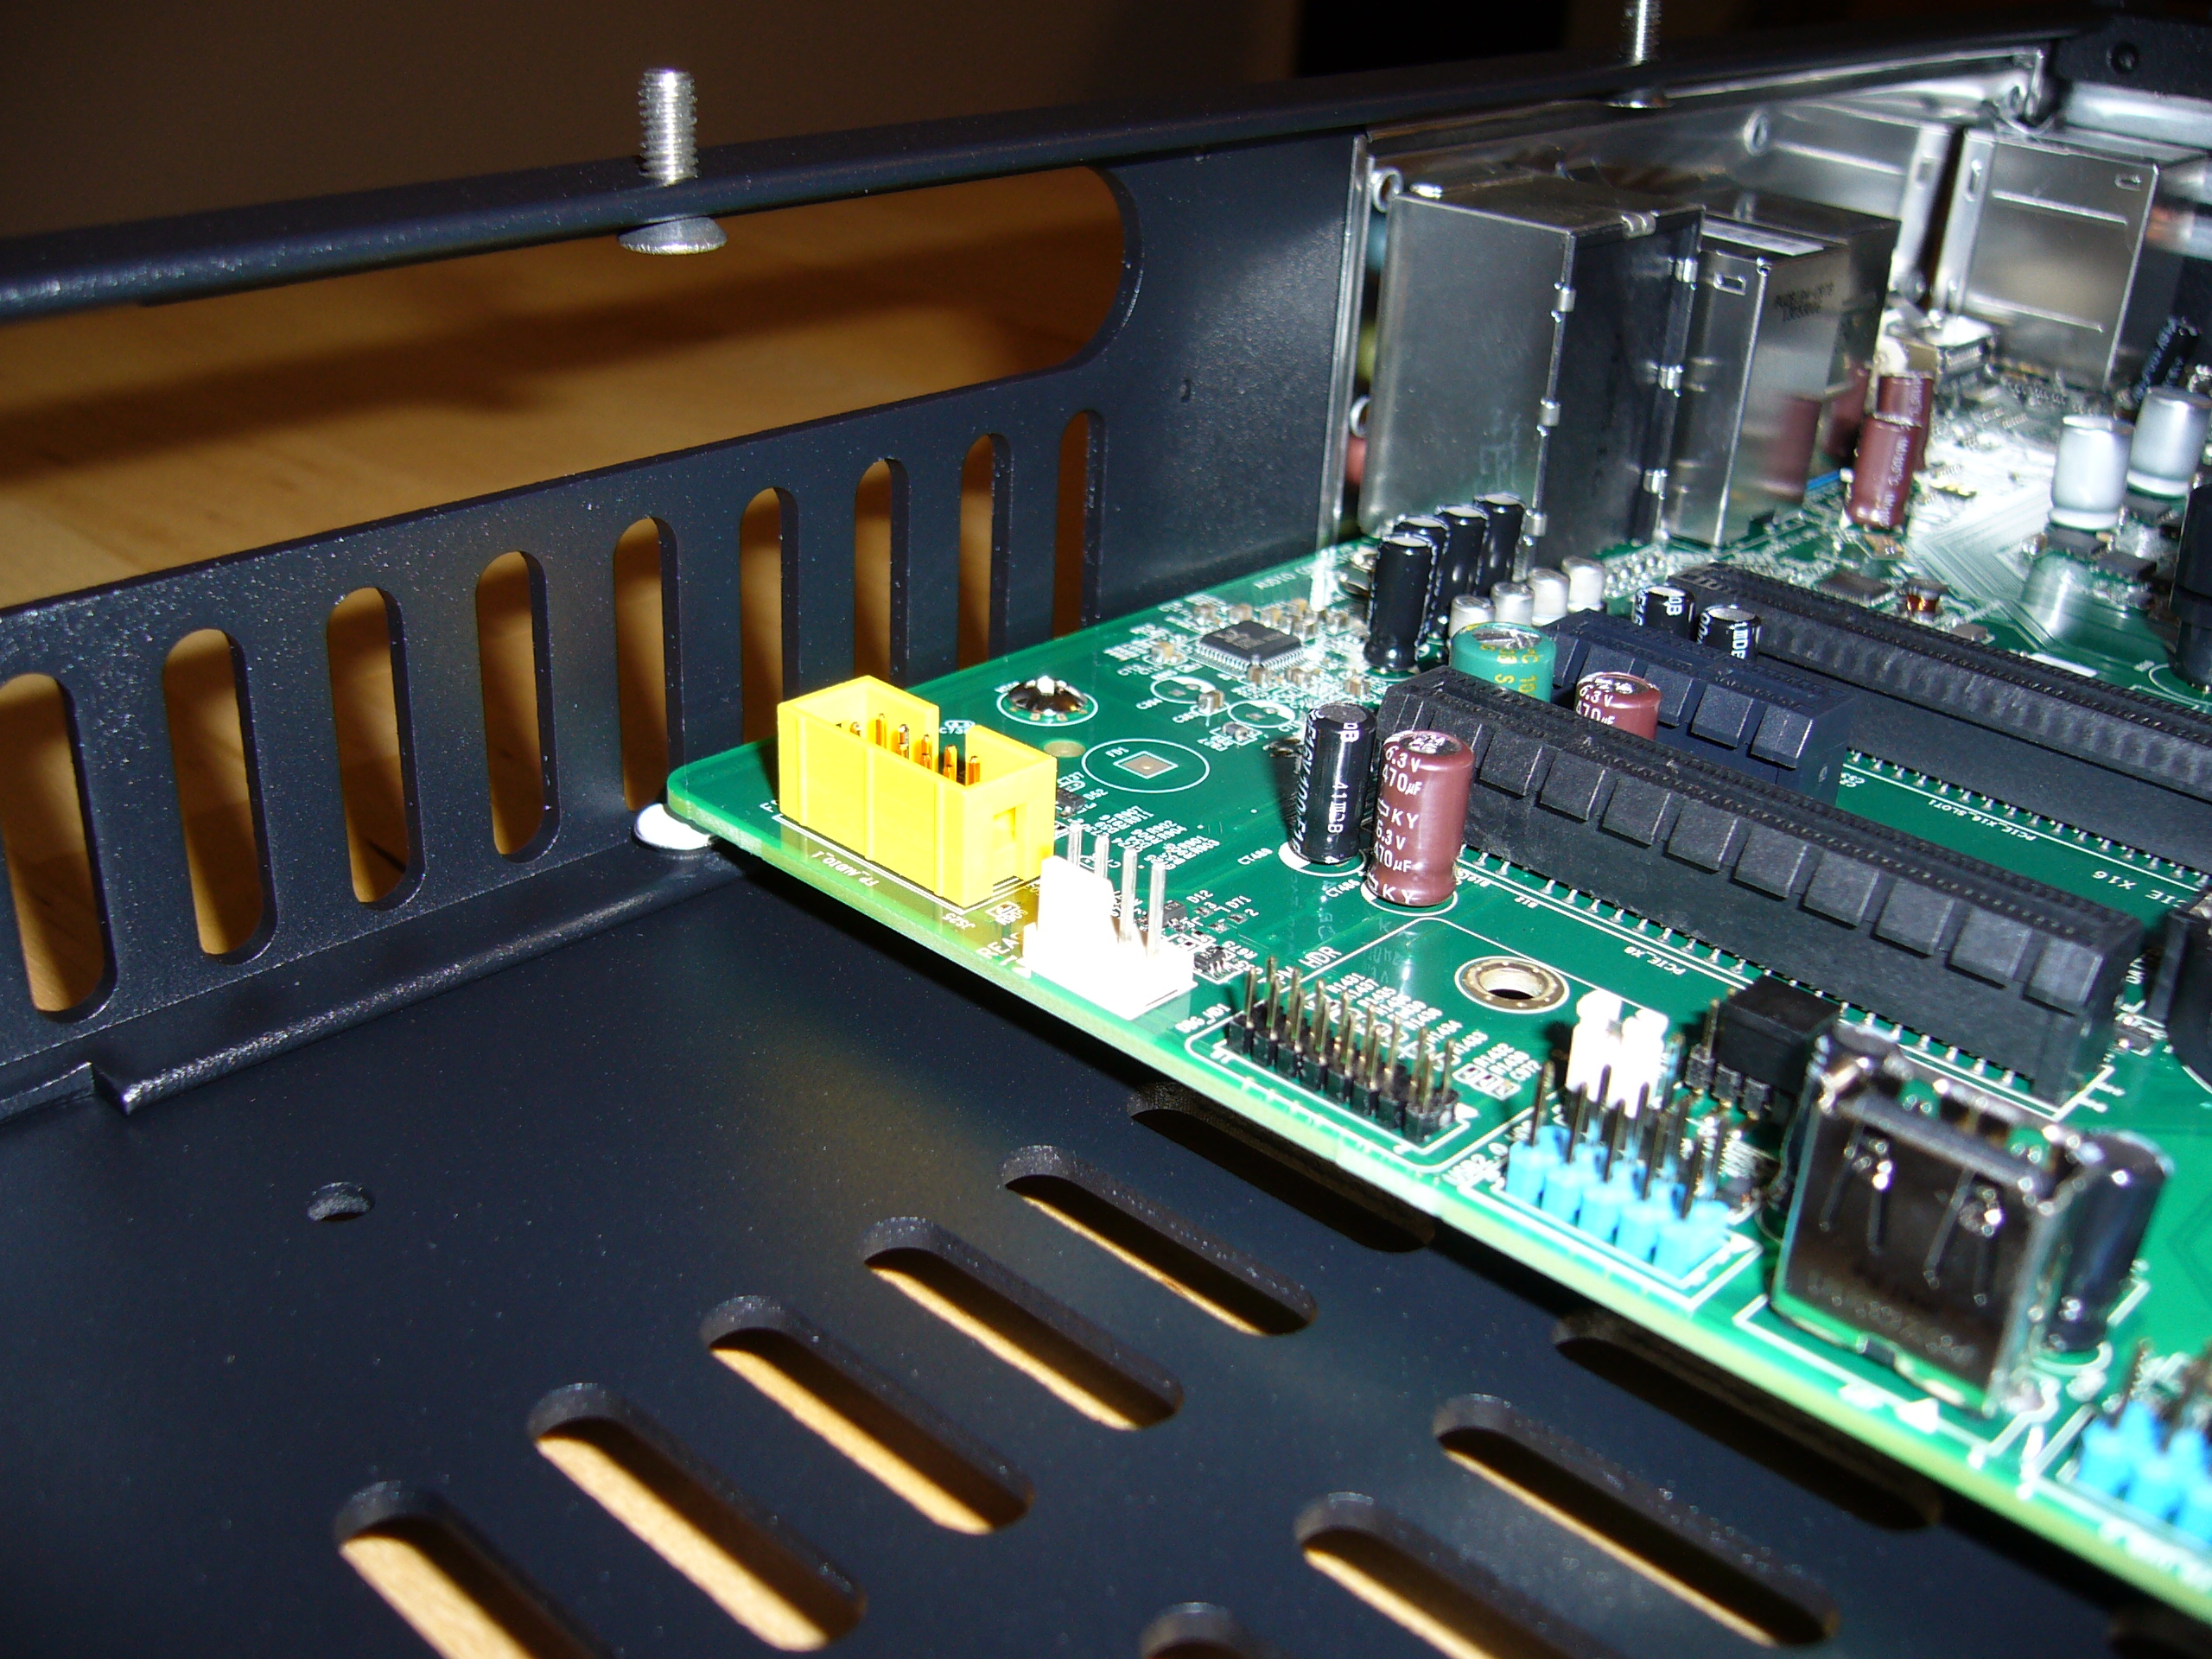 The focus here is the corner of the motherboard. Note the countersunk screws driven through the backplate: the arrangement is symmetric, so in
addition to the two upper screws visible in teh photo I have one underneath the corner of the motherboard and another underneath the I/O area. Using
countersunk screws was a bit cheesy, but I had them handy, the head height is small, and the heads are flat, enabling me to stick insulators over
the lower screws. The stamped-over flange on the backplate of the H10 was large enough that I did not have to modify the screws to fit - convenient.
I Loctited these as well, of course, as loosening studs - particularly underneath the motherboard - would ruin my day.
The focus here is the corner of the motherboard. Note the countersunk screws driven through the backplate: the arrangement is symmetric, so in
addition to the two upper screws visible in teh photo I have one underneath the corner of the motherboard and another underneath the I/O area. Using
countersunk screws was a bit cheesy, but I had them handy, the head height is small, and the heads are flat, enabling me to stick insulators over
the lower screws. The stamped-over flange on the backplate of the H10 was large enough that I did not have to modify the screws to fit - convenient.
I Loctited these as well, of course, as loosening studs - particularly underneath the motherboard - would ruin my day.
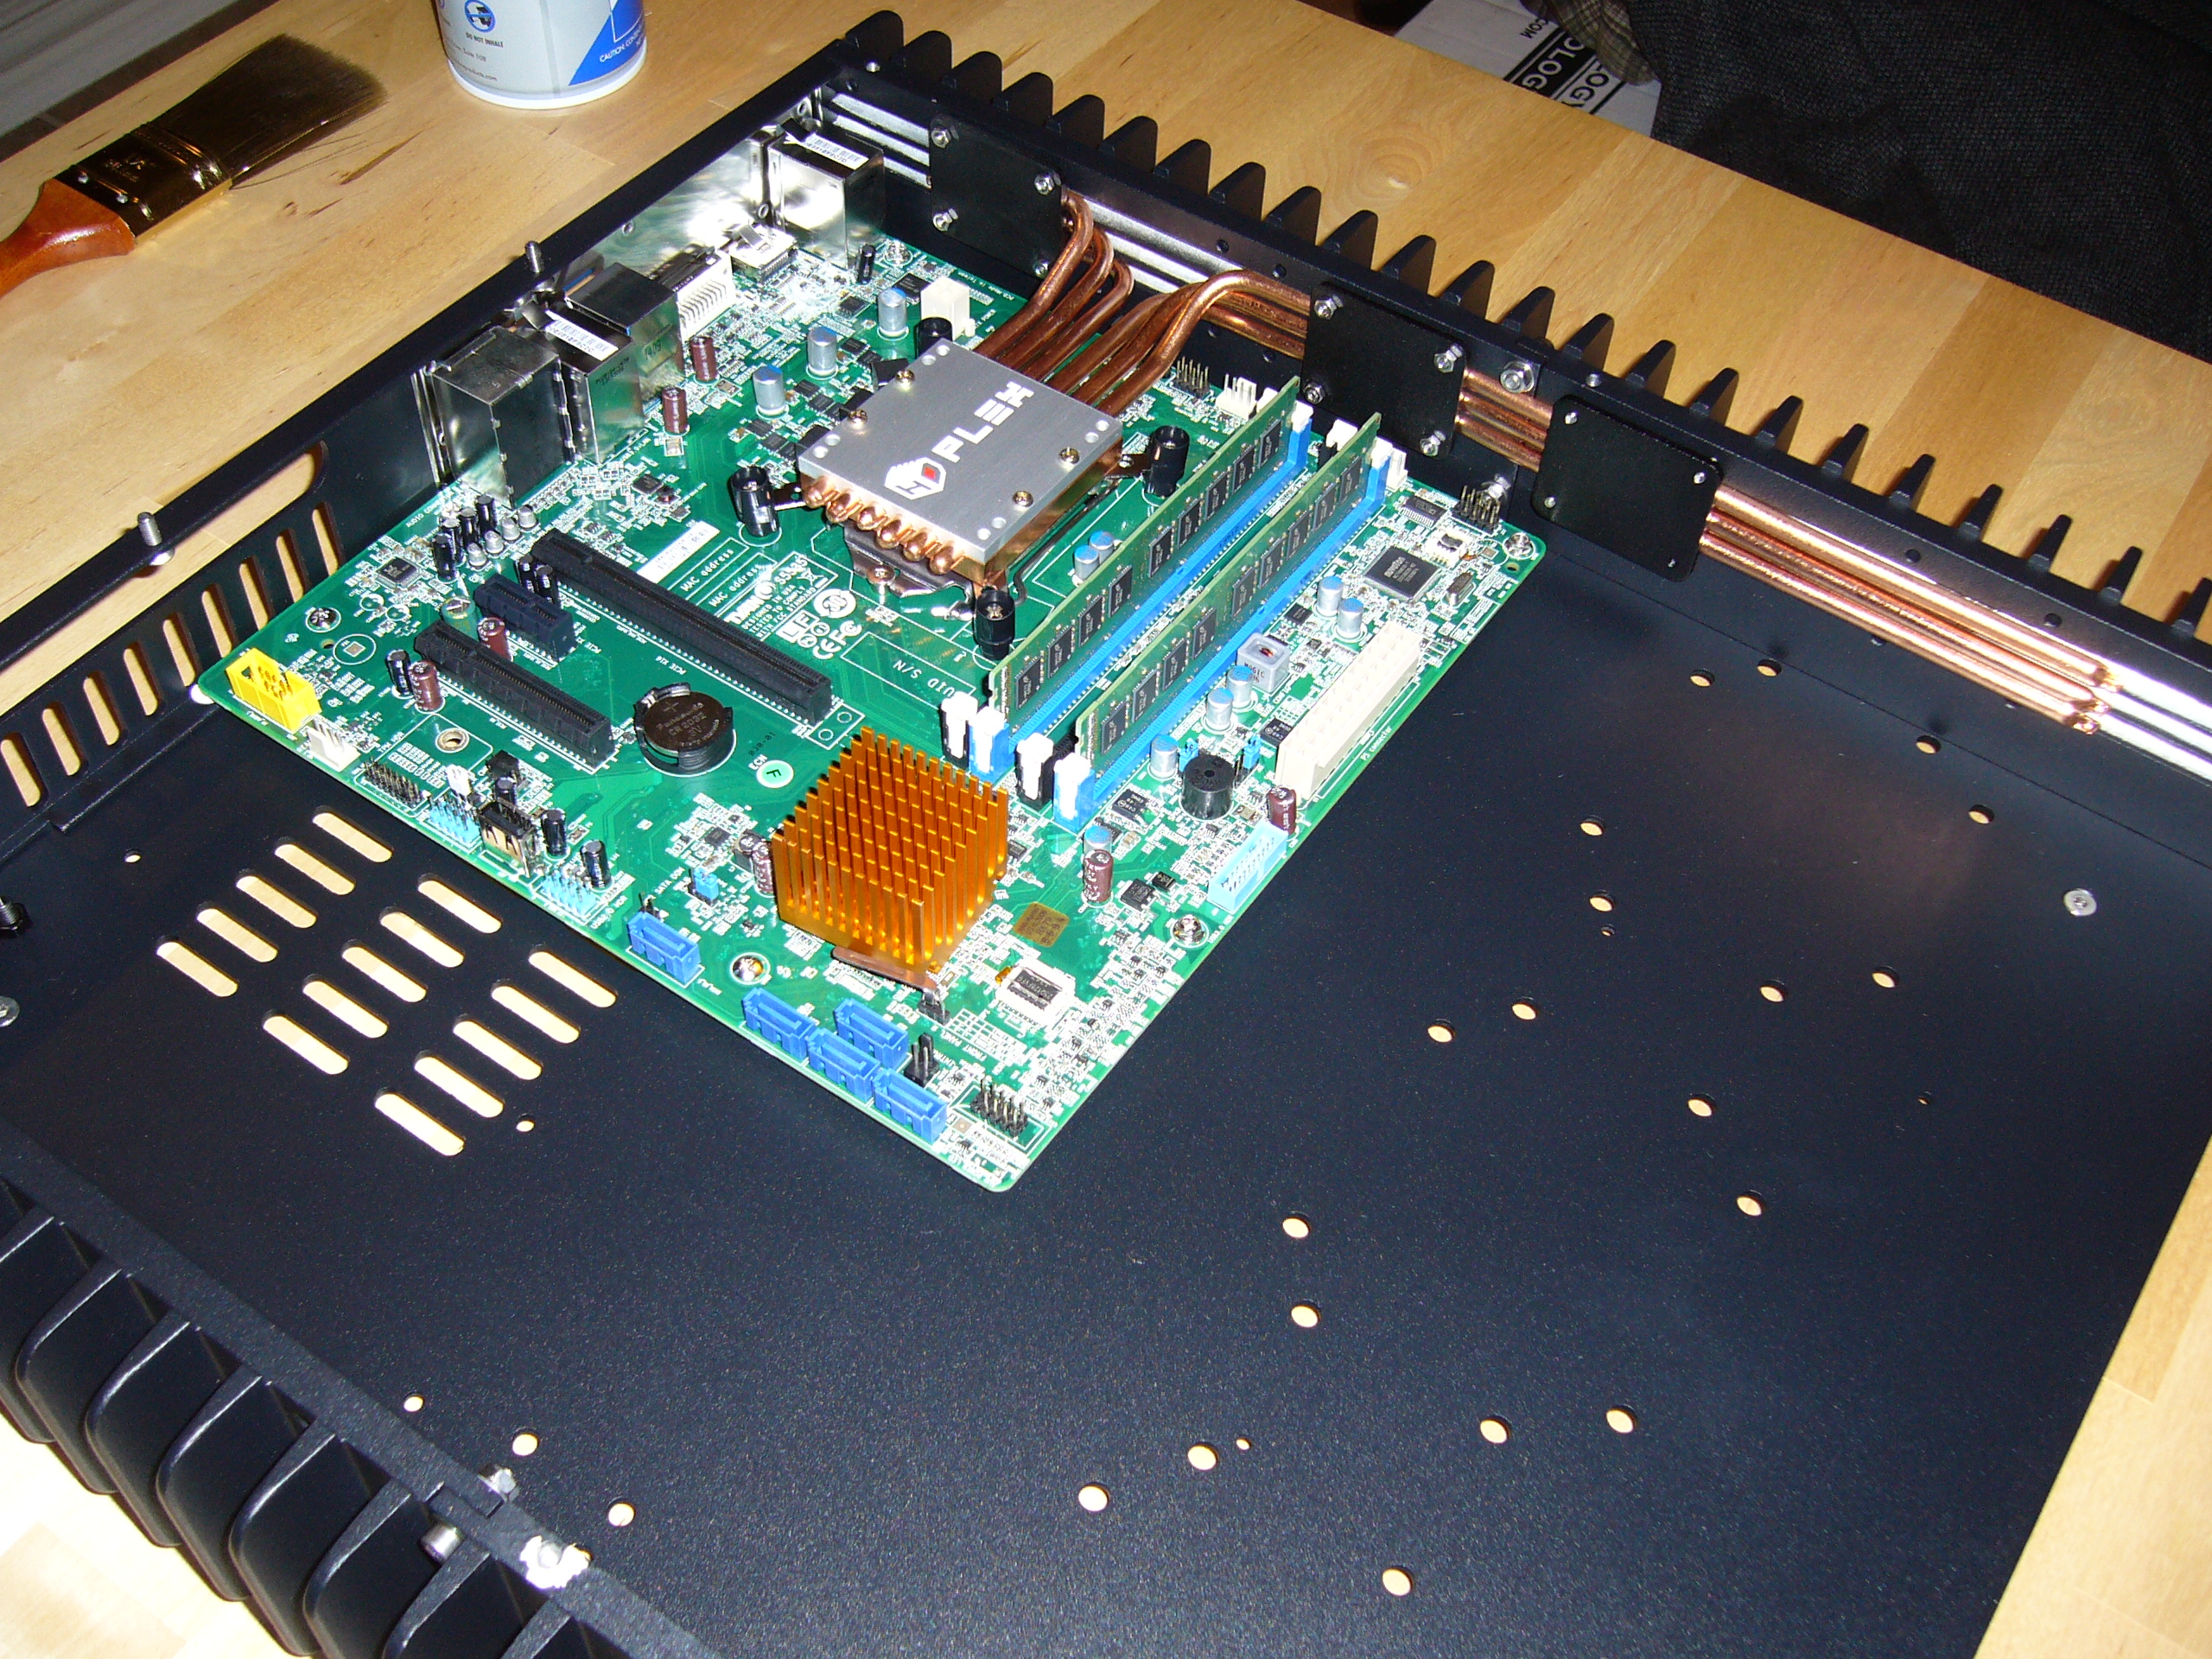
 Here all four heat pipe retainers have been installed and tightened. This model case had rather tight grooves, so it took some effort to smash the
heat pipes into place. I don't like to thread into thin aluminum under any circumstances, but the twist I had to put on these screws really made me
want to add nuts to them.
Here all four heat pipe retainers have been installed and tightened. This model case had rather tight grooves, so it took some effort to smash the
heat pipes into place. I don't like to thread into thin aluminum under any circumstances, but the twist I had to put on these screws really made me
want to add nuts to them.
You can see the pipes bulging out of the grooves a bit between the rightmost retainers. I had carefully (!) clamped the heat pipes into place with a soft-faced clamp, and I managed not to crush any pipes. It takes a bit of fiddling to align the pipes and keep them aligned while tightening the retainer plates. Naturally you want to loosely install the CPU block heat pipe clamp first, but tighten it last.
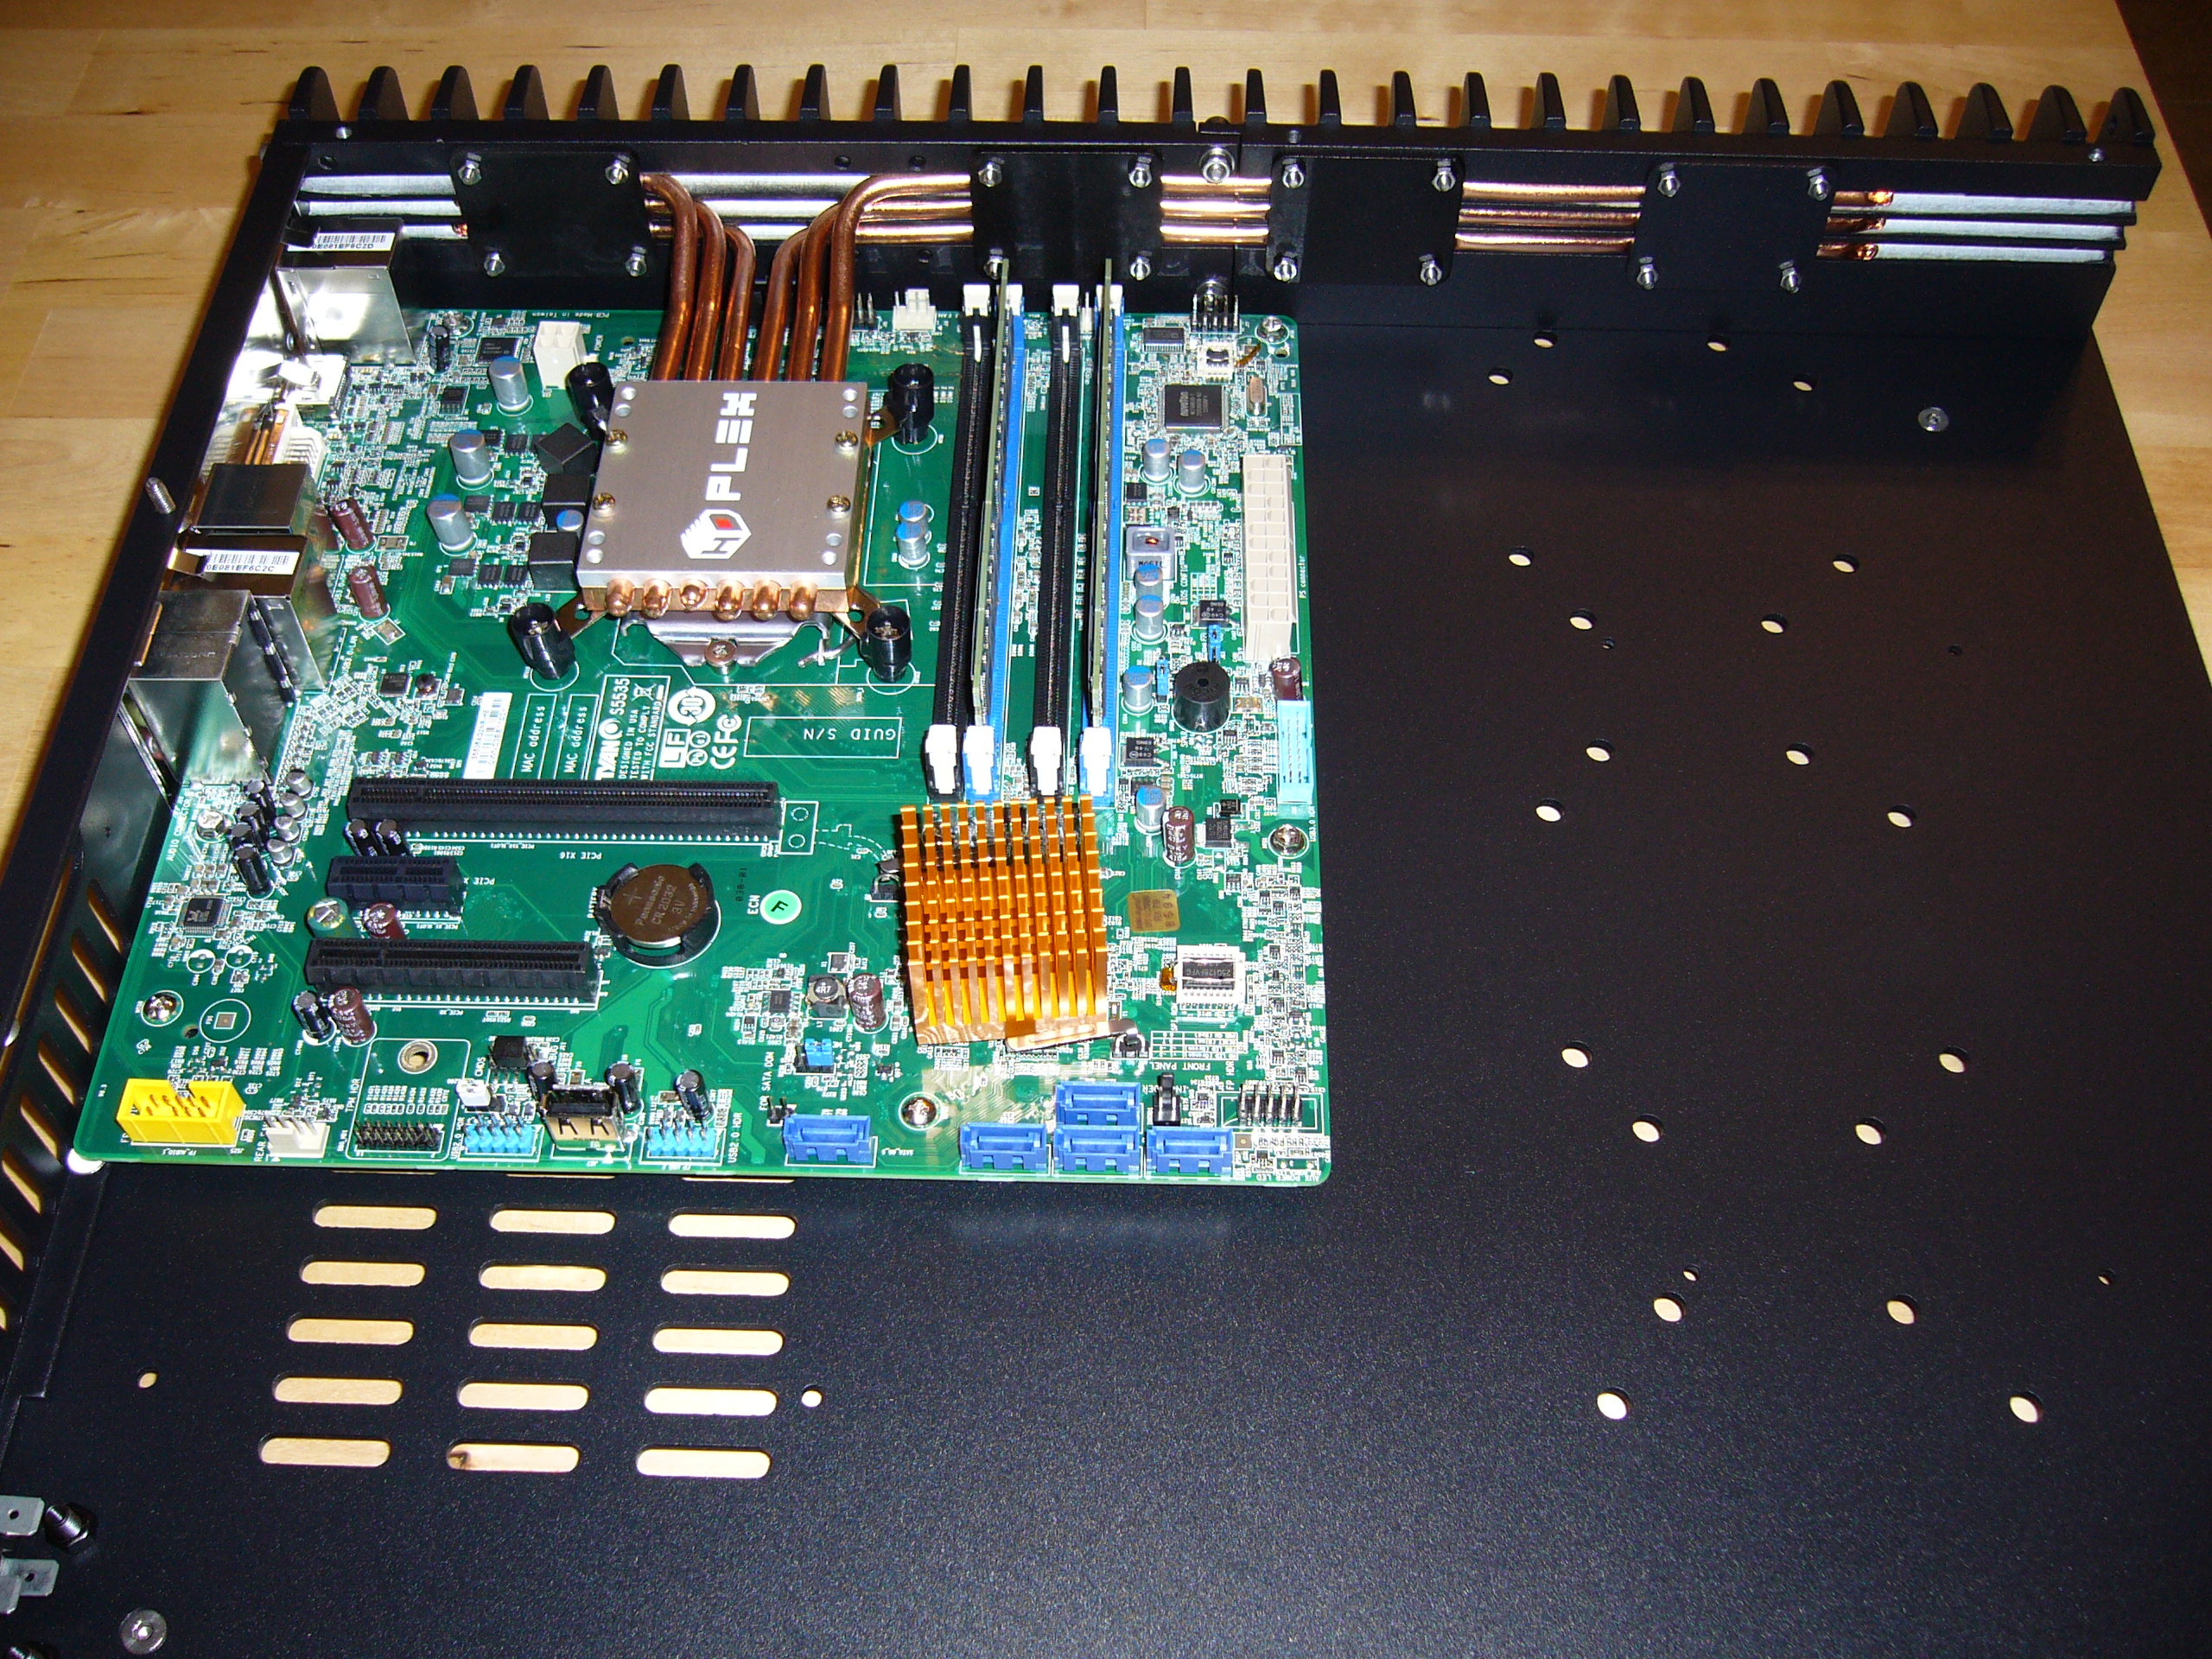
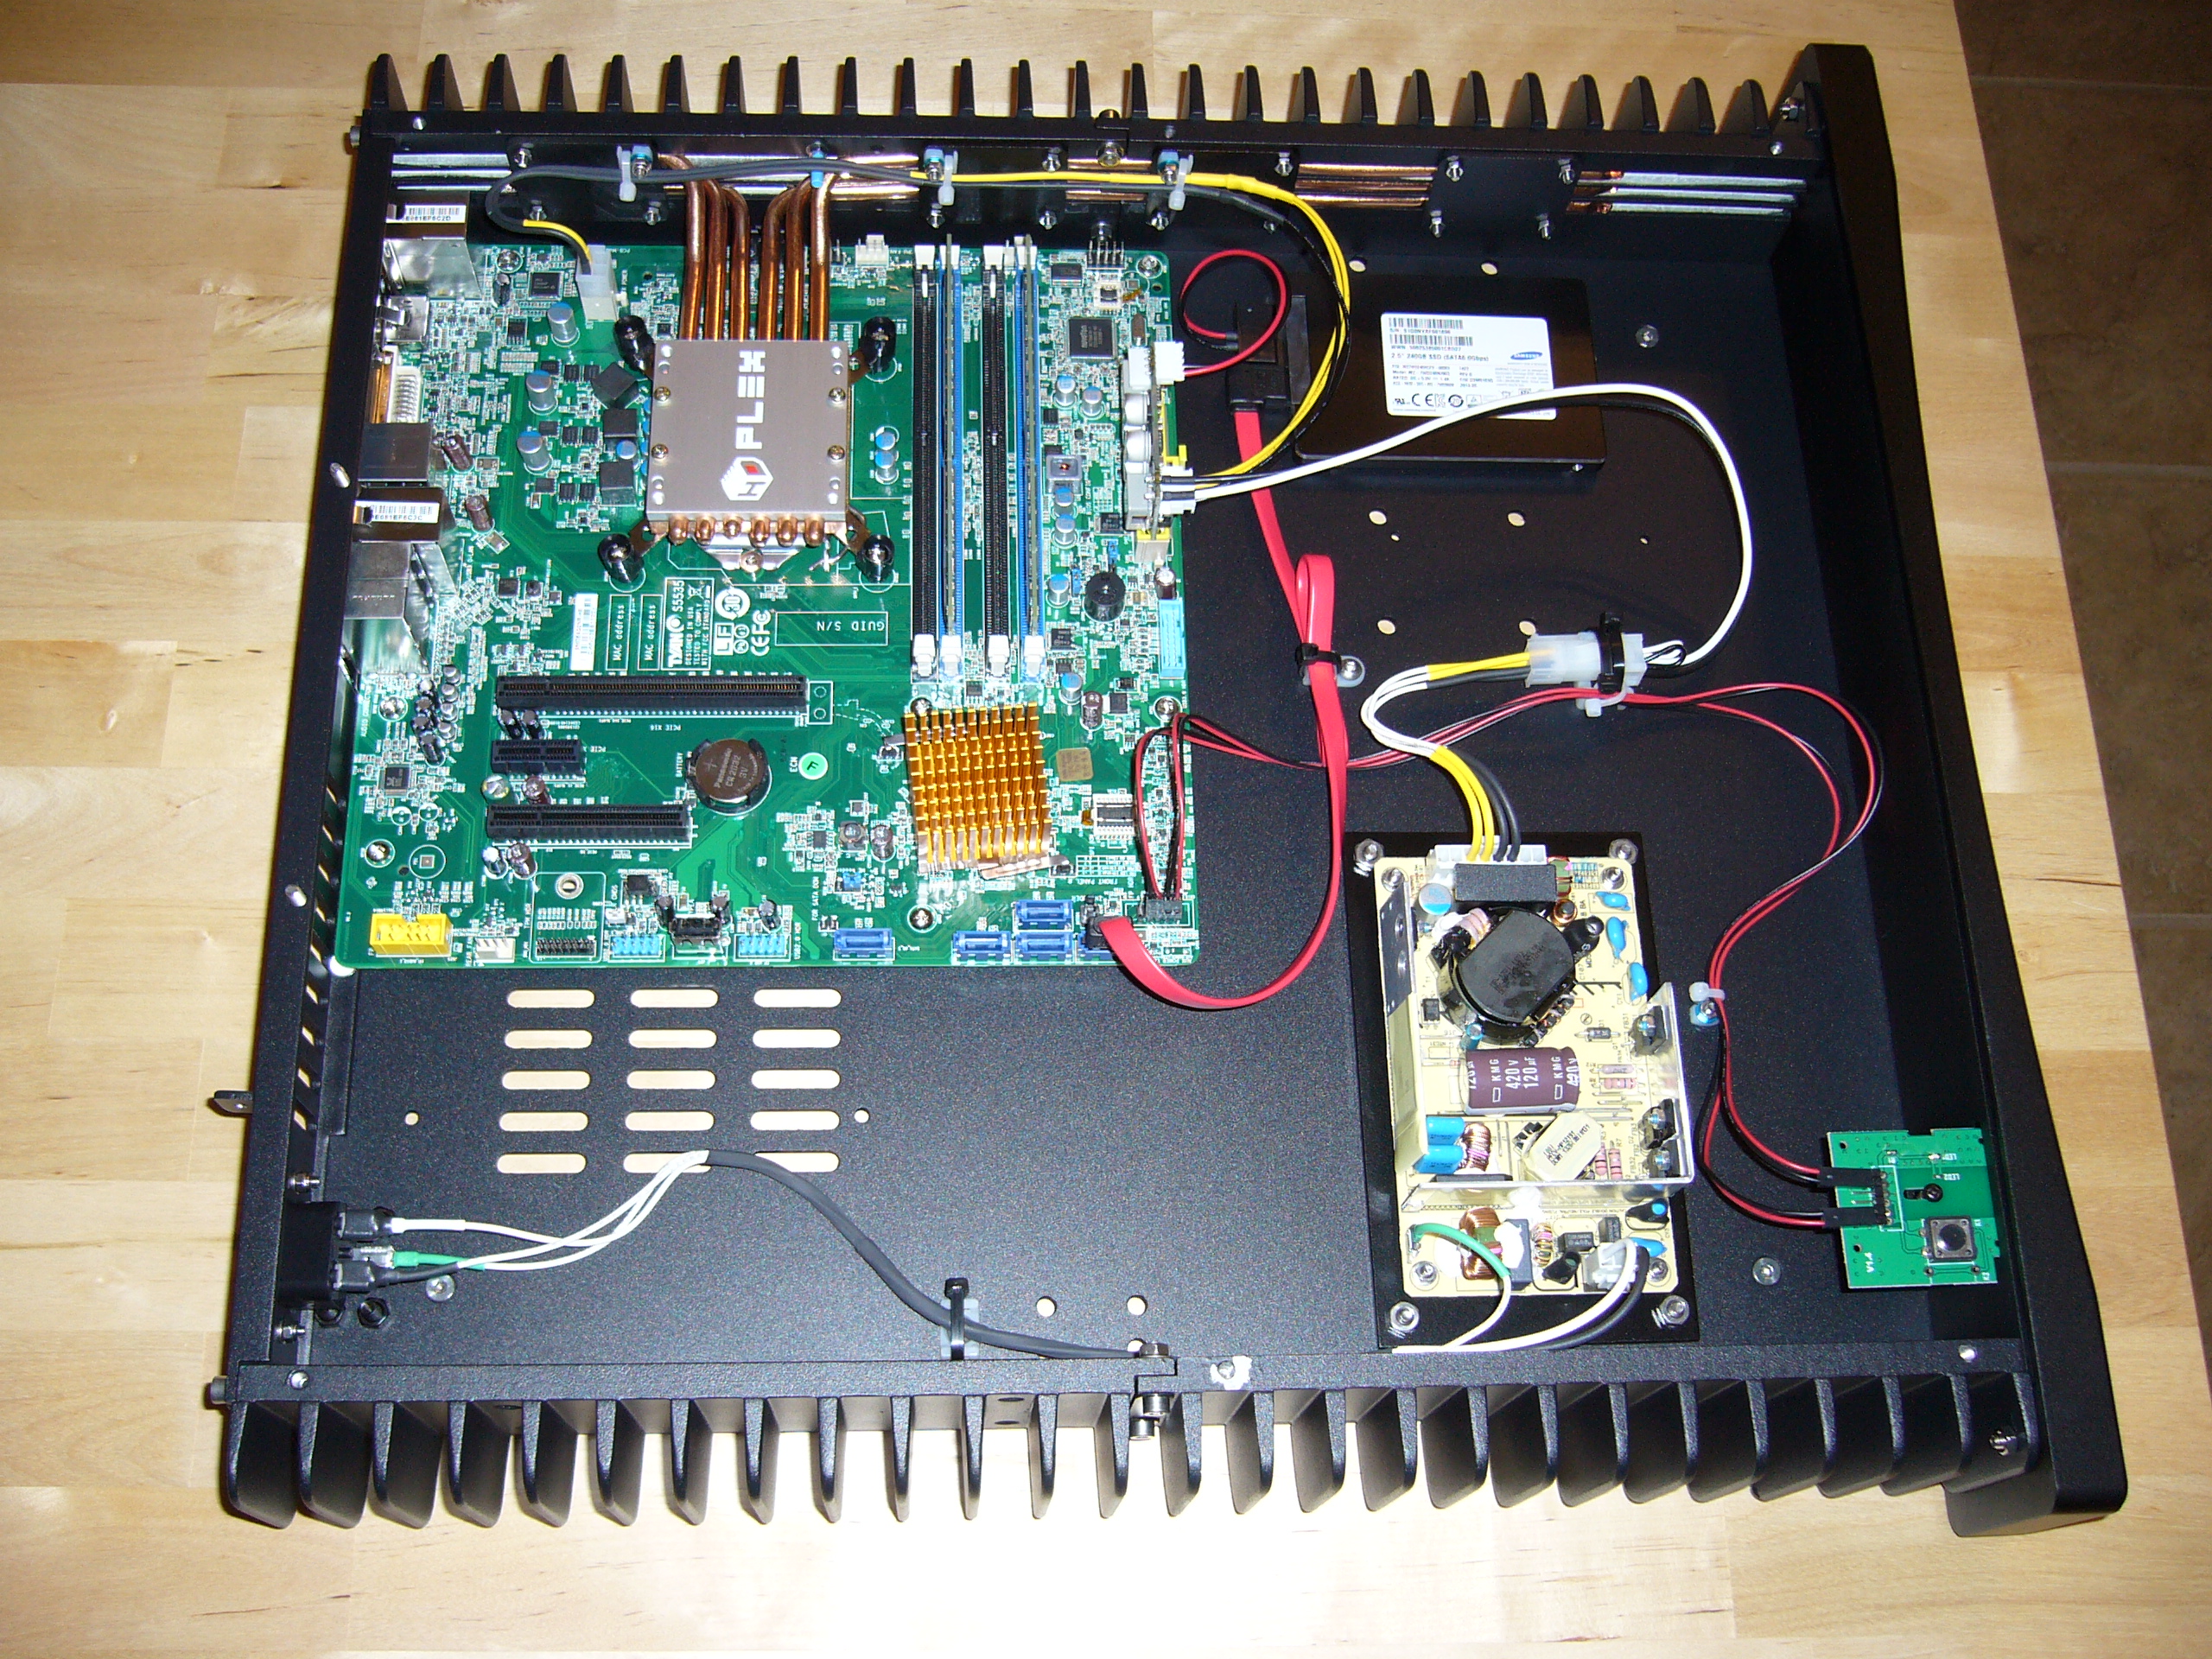
 Everything installed.
Power is supplied by a Delta MDS-065APS12 (AC-12VDC) to a picoPSU-160-XT. I mounted the Delta to an adapter plate as I (for some reason) did not want to drill the bottom plate. The ATX12V wiring is a bit hinky... I wish folks would ditch the super-tiny JST connectors - the current rating of these (1.5A/pin) is questionable for... well, just about anything. Fortunately 35W = 12V 3A = 2 pins, so the connector should peak just below combustion temperature.
Note the path of the ATX12V cable... I tied it in a couple spots, and used a long screw with a bit of shrink tube over the threads to hold it off of the heat pipes. Which is not strictly necessary, as the exposed areas of the heat pipes themselves do not get particularly hot. The CPU block and heat sink get pretty toasty, but well below the 100+C limit of the wire insulation, shrink tube, and nylon cable ties and mounts.
The SSD is a Samsung... er, enterprise-level SATA device of some sort. I could read it from the machine itself, but I'm too lazy.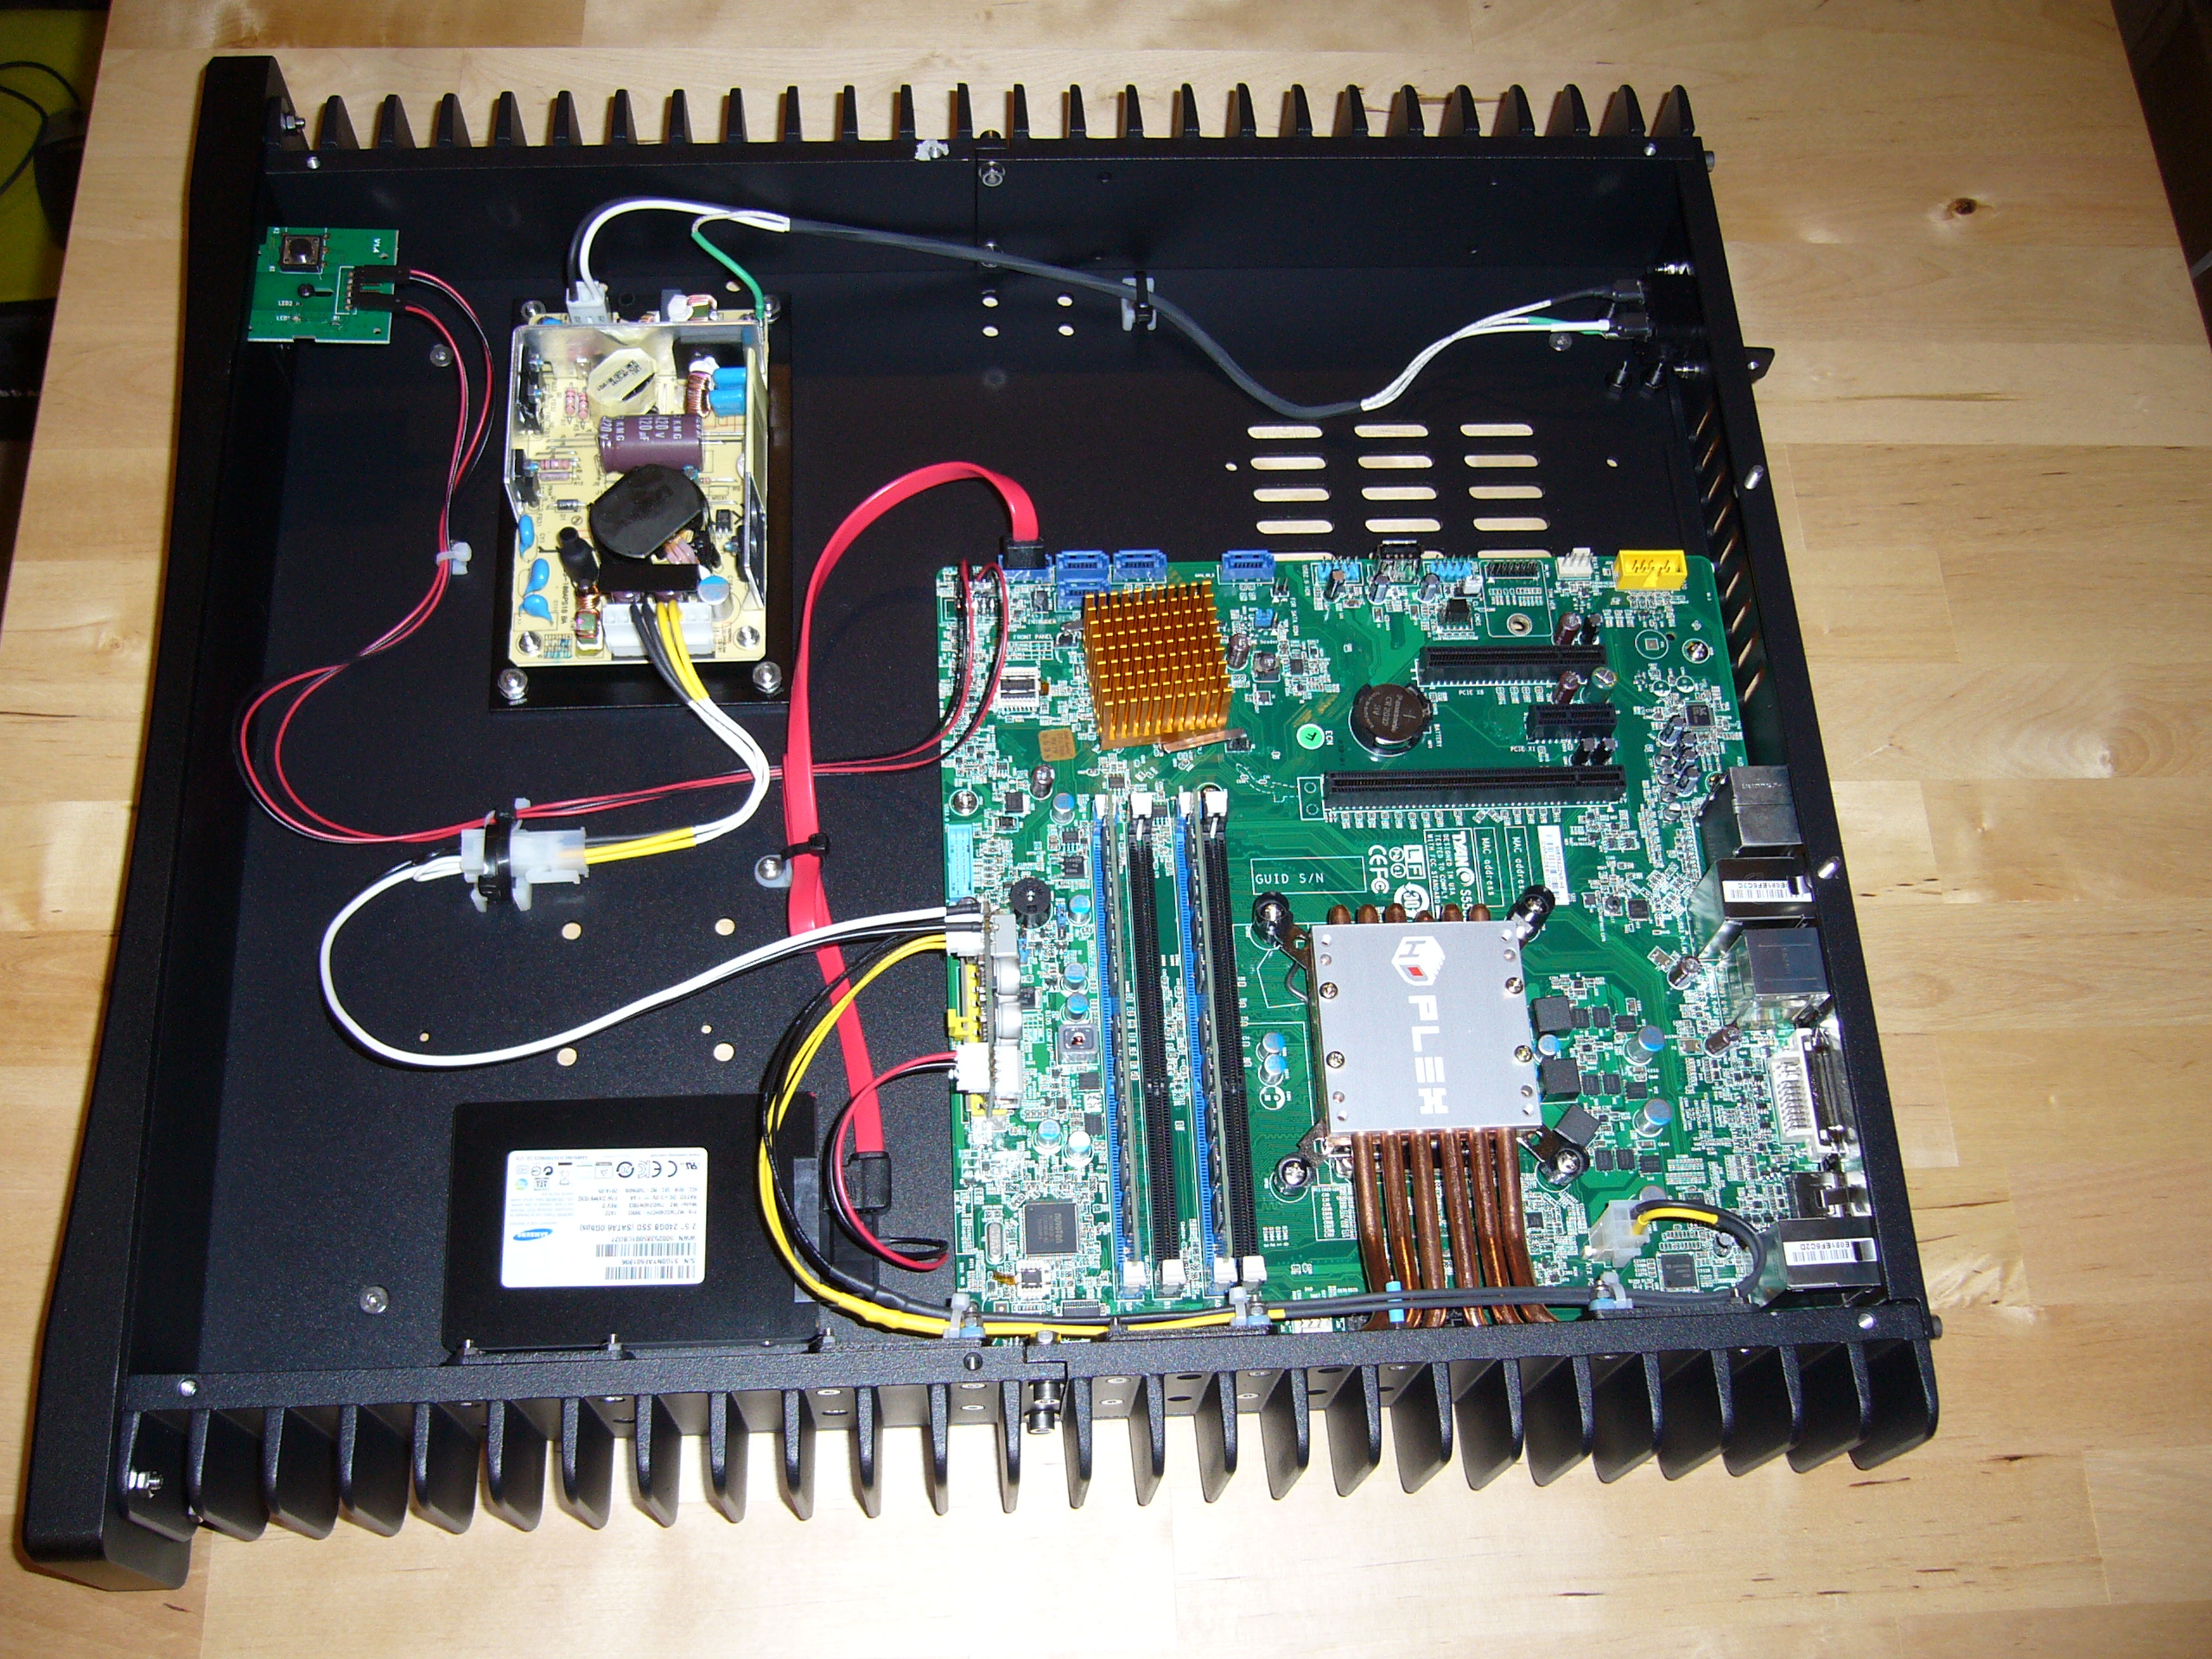
 And on to testing. I test all of my machines (the fanless ones in particular) in a 30C/86F room (easy to accomplish in the Texas summer). This one
runs the coolest (of the fanless ones)... but it is by far the least ambitious. 35W CPU, 4W chipset, 2.5" SATA SSD... easy.
And on to testing. I test all of my machines (the fanless ones in particular) in a 30C/86F room (easy to accomplish in the Texas summer). This one
runs the coolest (of the fanless ones)... but it is by far the least ambitious. 35W CPU, 4W chipset, 2.5" SATA SSD... easy.
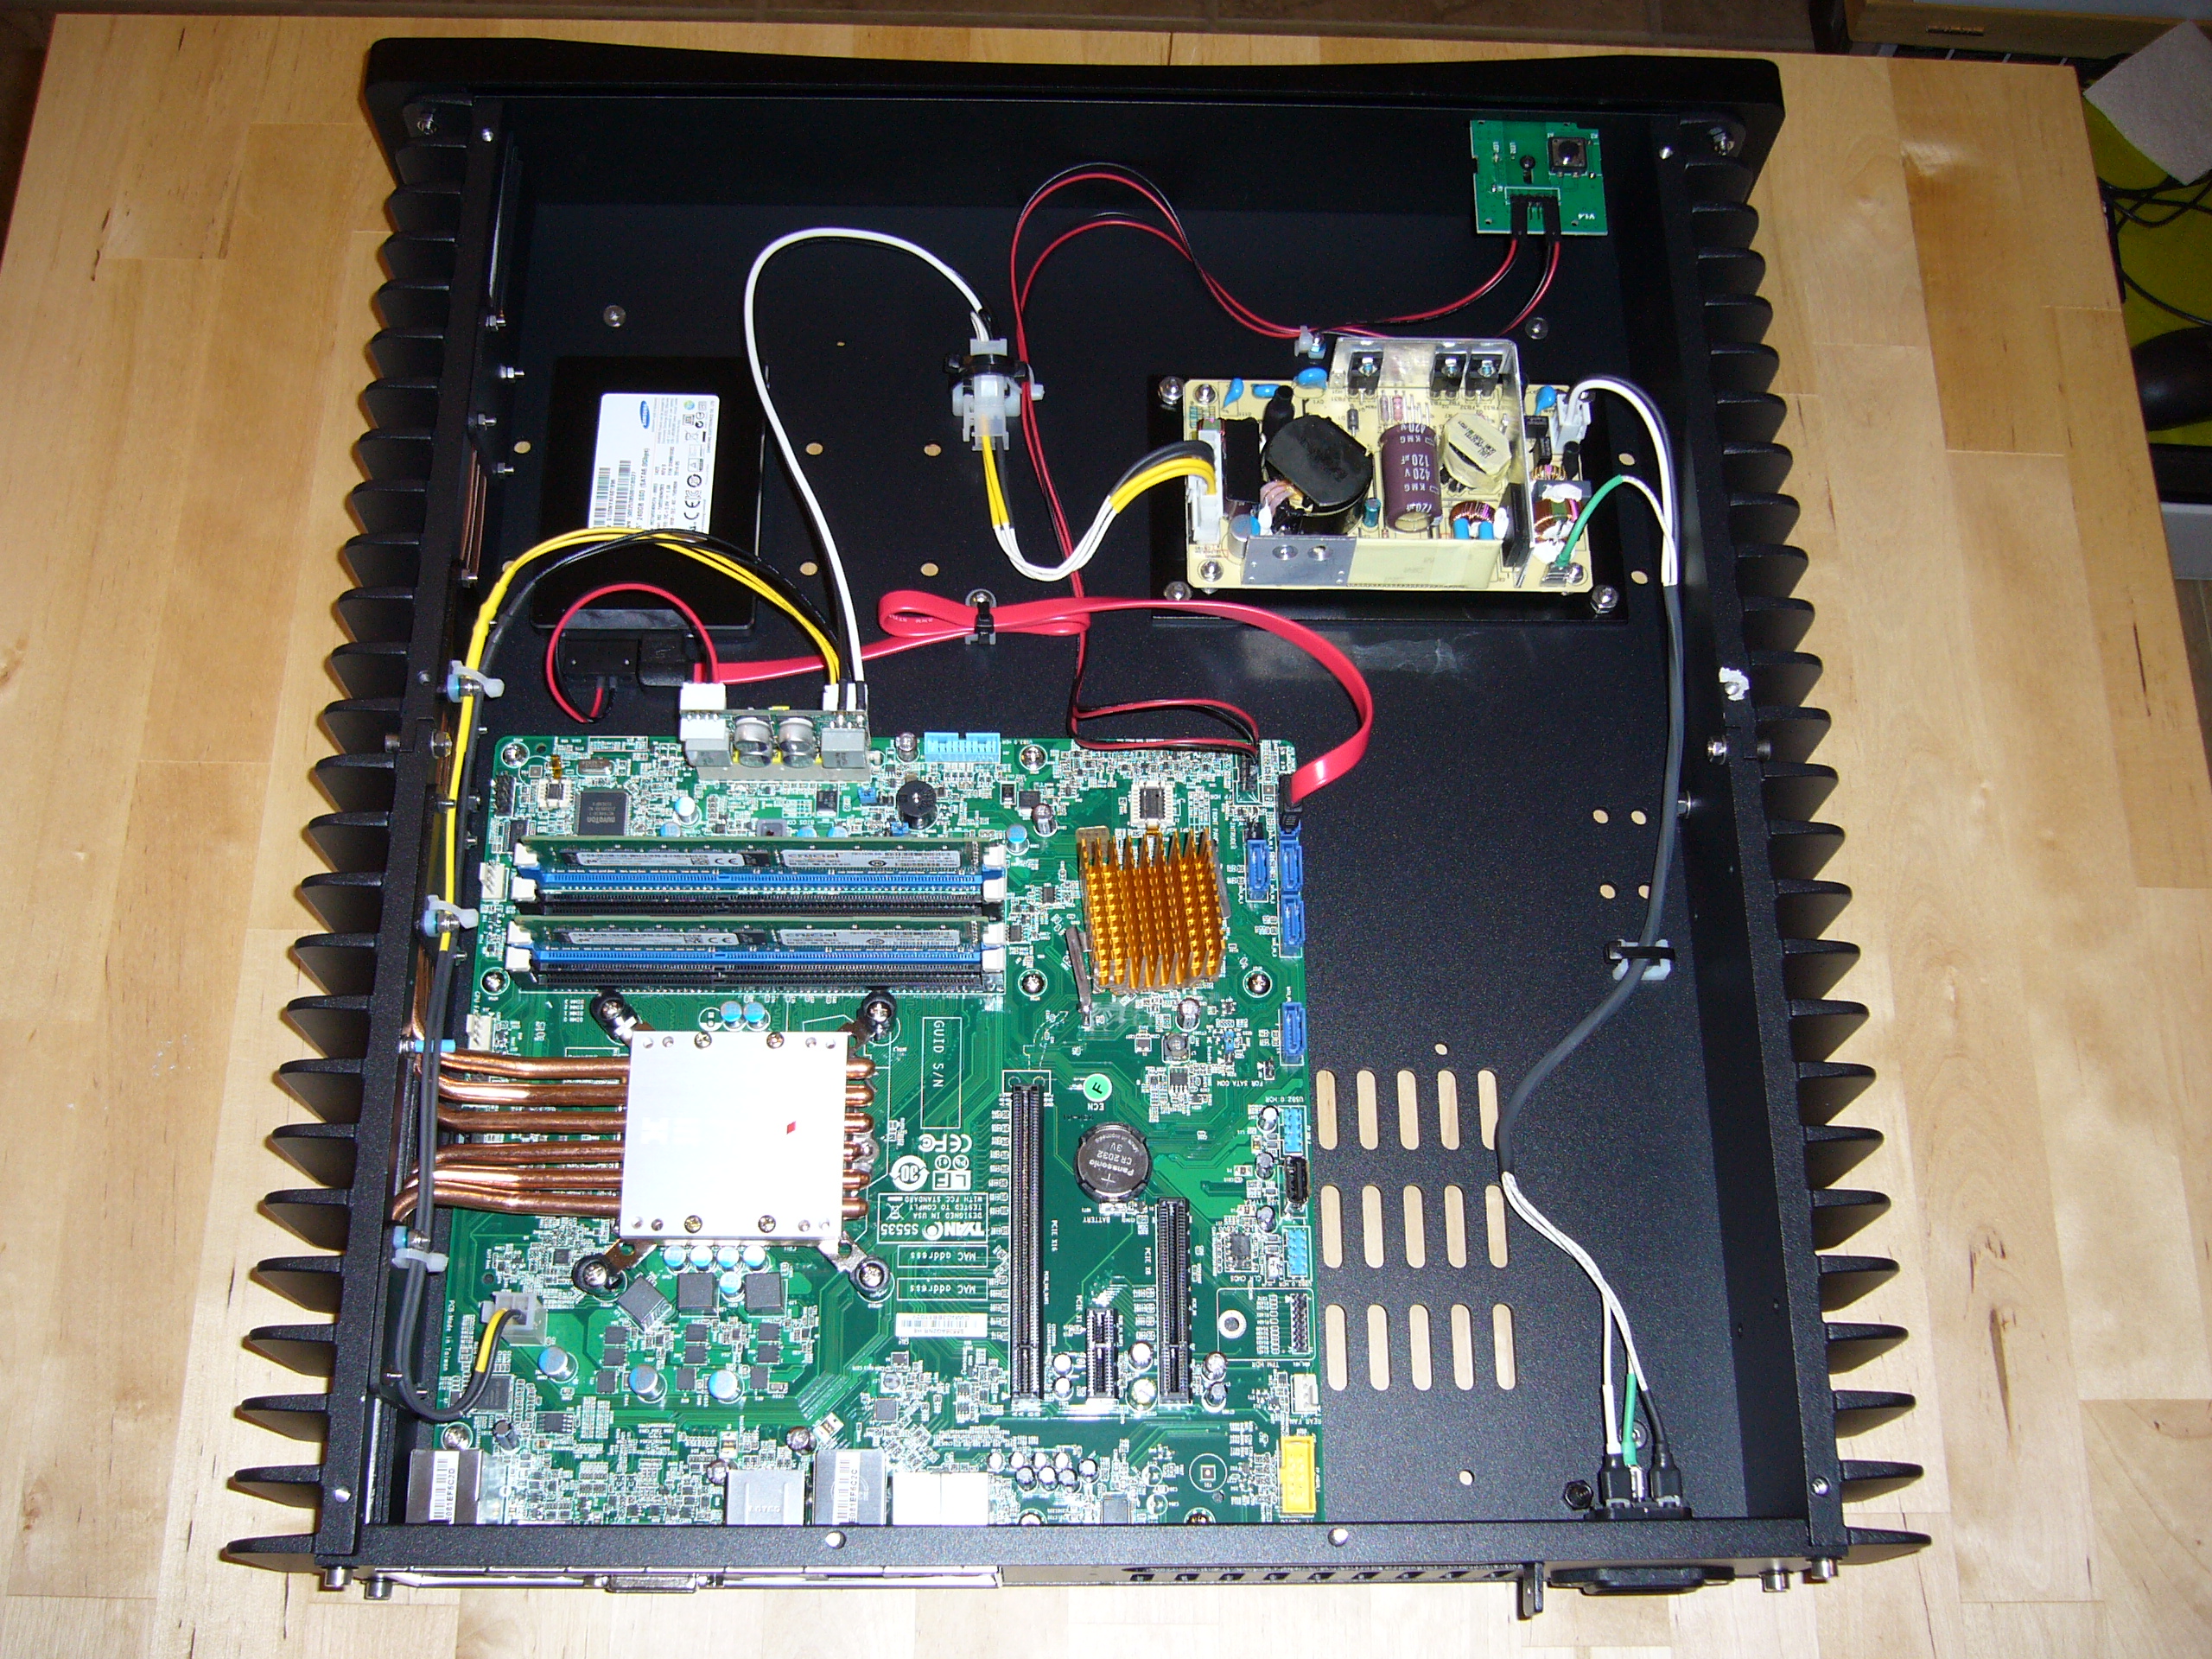
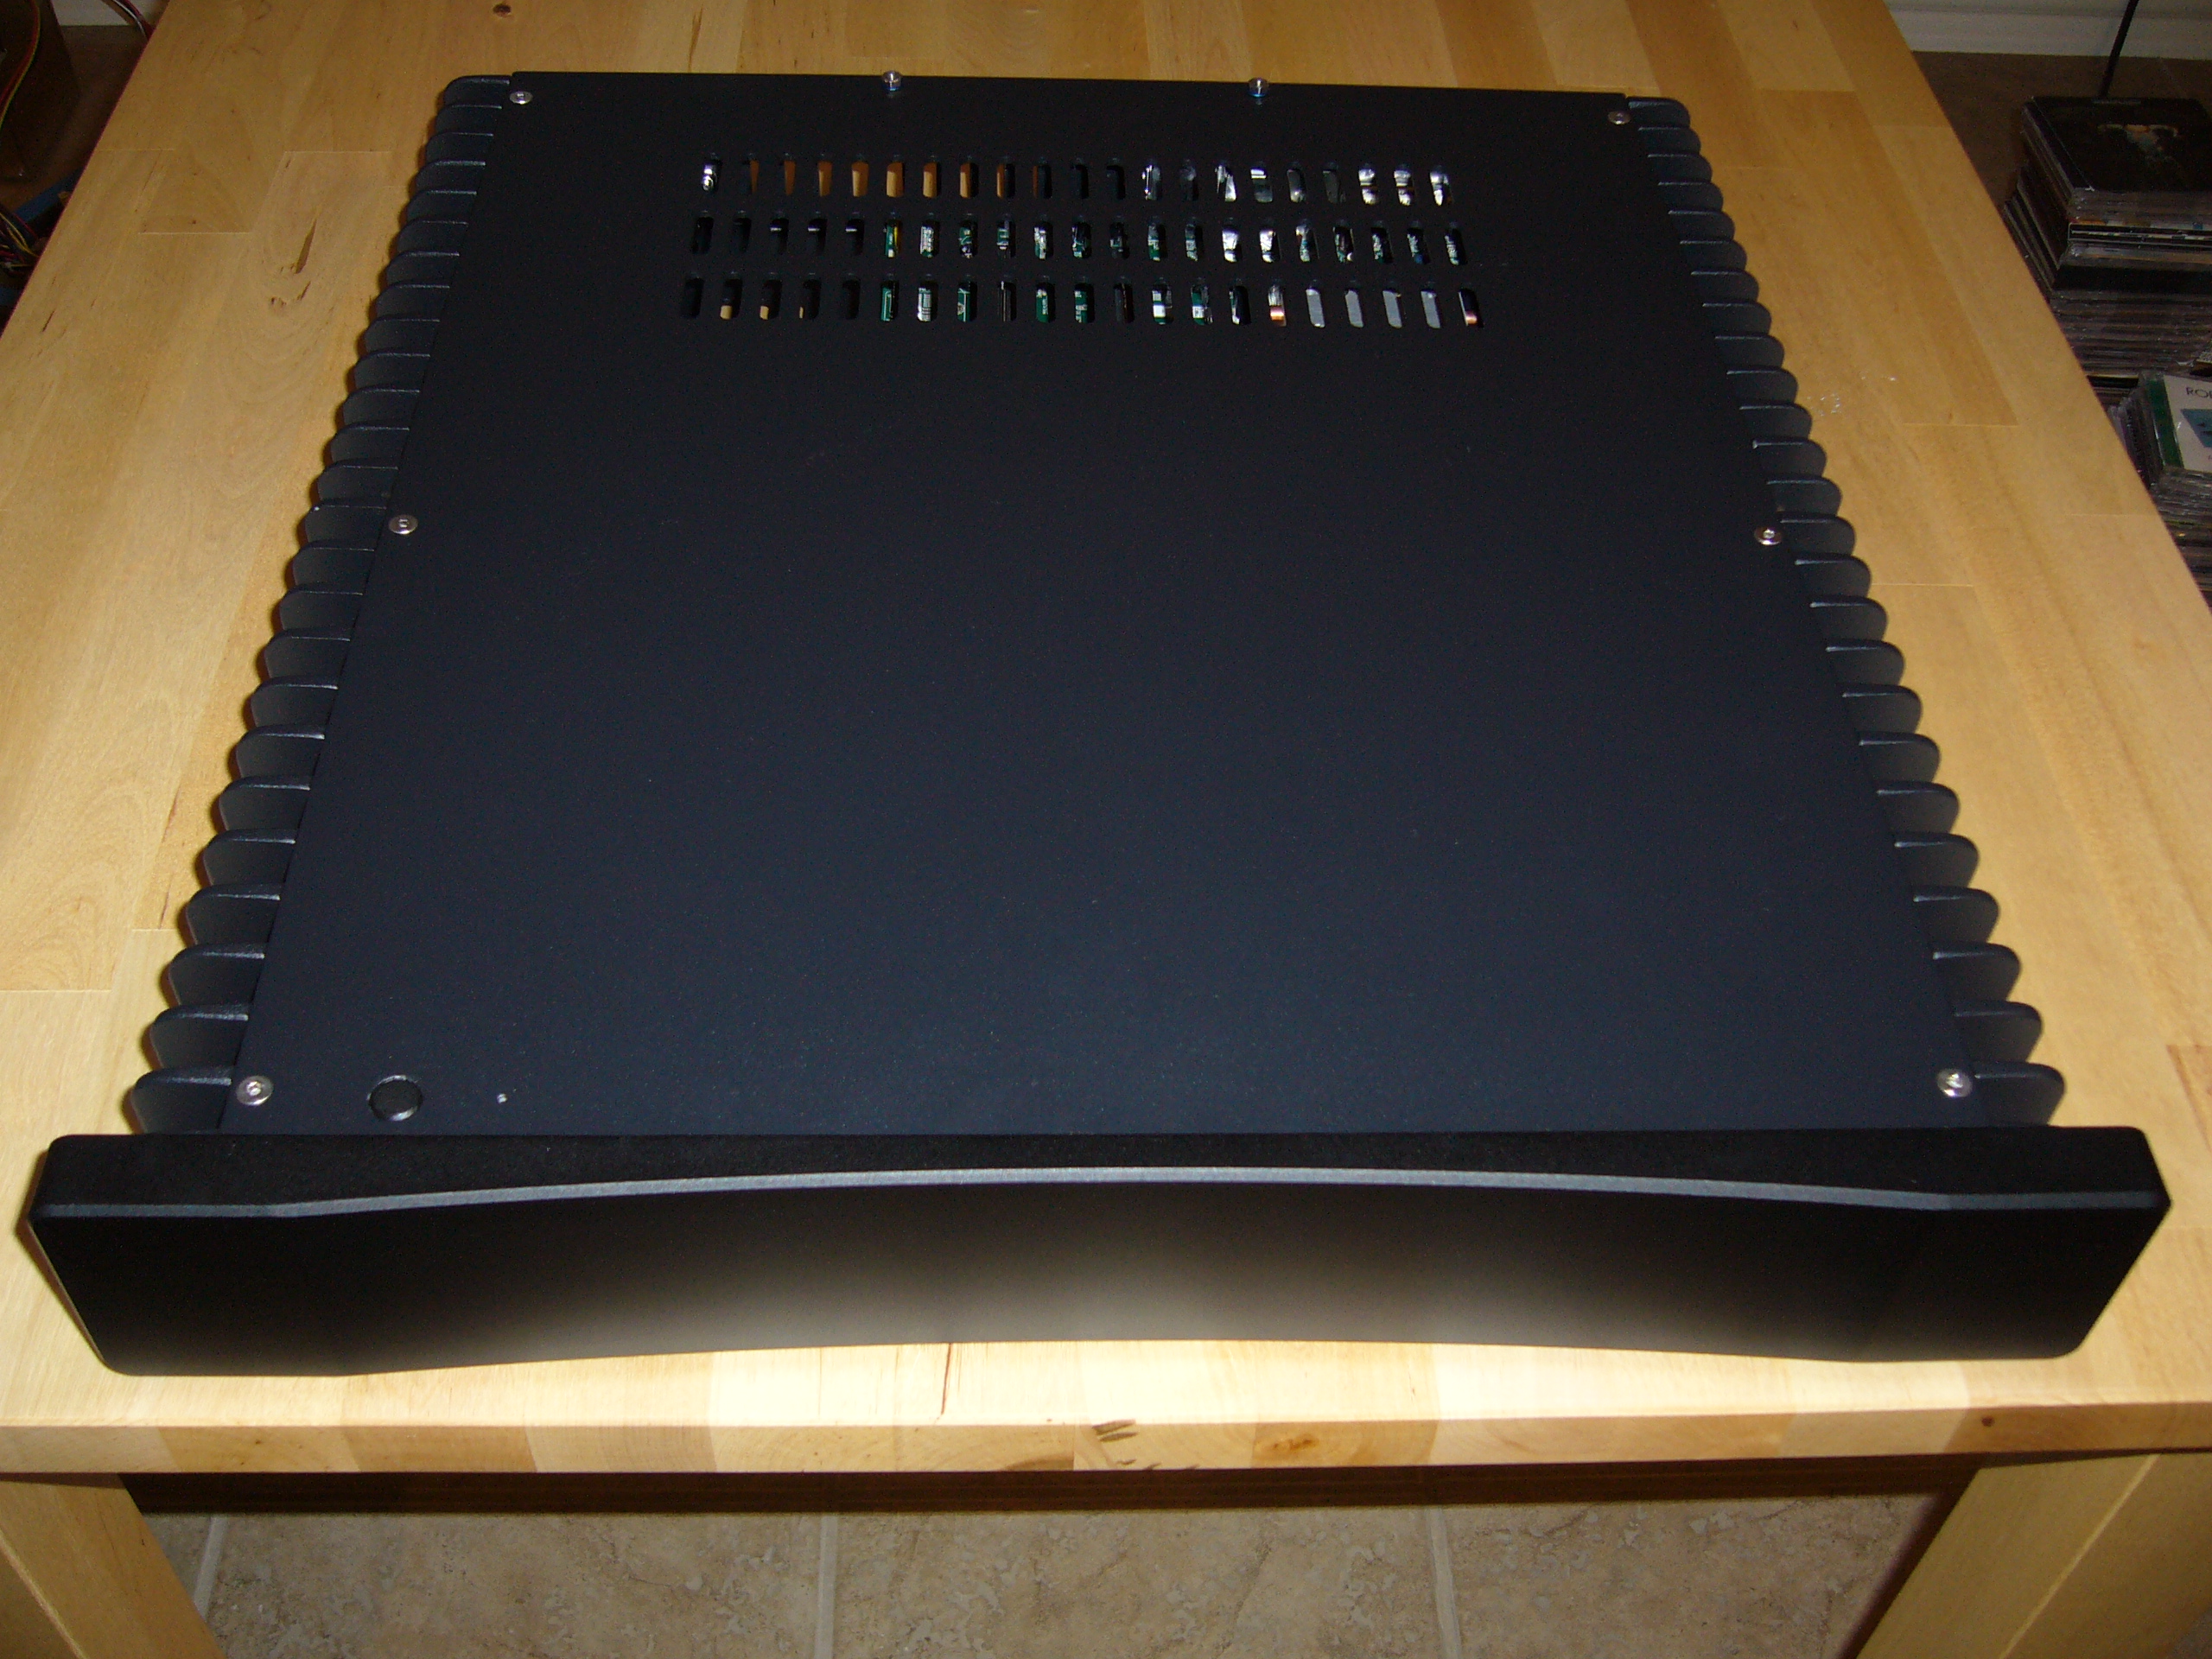 Complete. This machine has been running as secondary DNS and mail since late 2015 (as of 1/2023).
Missing detail: You can barely see the blue anodized countersunk washers installed on the backplate studs. I made those using M4 aluminum socket head countersunk screws with the head drilled through/off with a 4mm step bit. I use them on the H5v2 and H3v3 as well.